I haven't been posting many pictures lately, I know. I've been having trouble getting my shots to come out well, partially because the days are shorter and the light I usually depended on in the summer is now well before dinnertime. This time, I was able to scrounge up enough afternoon sunlight to do the job.
When I went through the pantry, I noticed we didn't have enough tequila to make another set (or even one) of margaritas. I don't have the room for two bottles of tequila until we have margaritas again, so Tequila Lime Chicken Tacos went on the menu. Now, this chicken recipe is good just on its own with a salsa topping, but mmm.. fresh, homemade tortillas... Gotta be taco night!
Tacos need salsa, however. Since I also scored some tomatillos from a local garden recently, a salsa verde seemed in order.
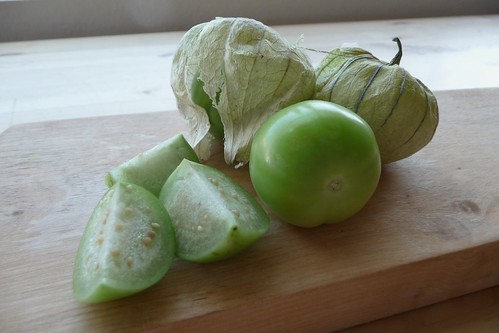
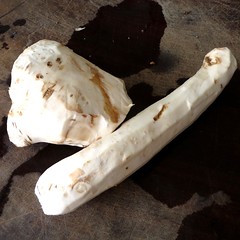
Tomatillos are tart green tomatoes with a papery husk, which is why you might know them as husk or ground tomatoes. They're usually used for salsa verdes (lit., green sauce) in Mexican cuisine, sometimes raw, sometimes roasted. For those of you who don't have tomatillos available fresh, you might be able to find them canned in the international/Mexican section in your grocery. If you don't have tomatillos at all, you can substitute green or plum tomatoes plus a dash of lemon juice.
According to foodsubs, cape gooseberries, which I had in Latvia where they're known as fizālis, are acceptable substitutes as well, but if they're very sweet, I would still add some lemon or lime juice as well.
(Personally, I'm thrilled that I finally know what these little golden guys are called. I usually had them at restaurants and cafes where they seemed to decorate the majority of desserts. We don't have cape gooseberries in my region of America so I had no idea what they were.)
Okay, enough babble. Let's cook!
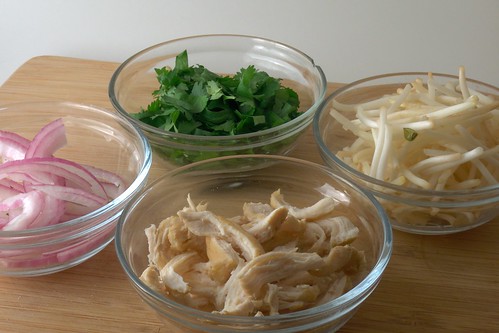
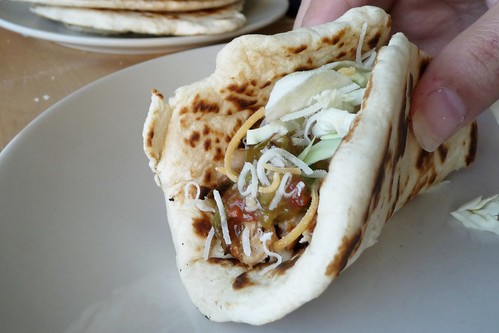
I like to build my tacos with shredded meat, cabbage, cheese and salsa, plus a twist of lime, leaving the beans and rice for side dishes. However, tacos are flexible. They don't mind how you put them together.
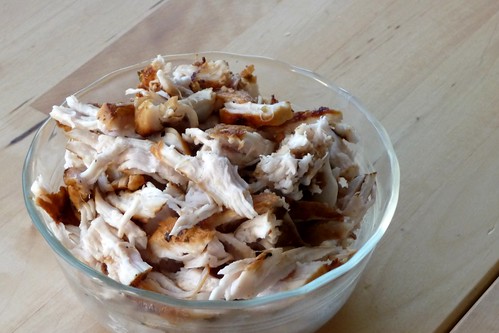
Most of the work here is in the marinade. After that, it's just frying it up and shredding it. Or, leave the breasts whole and drizzle the Roasted Tomatillo Salsa over them.
Serves 2 - 3 if shredded. Marinade will accommodate 2 whole boneless breasts.
Marinade:
- 2 tbsp teriyaki sauce
- juice of 1 lime
- 1 tbsp (3 cloves) garlic, crushed
- 2 tbsp tequila
- 1 tsp oregano
- 1/2 tsp ginger
- 1 or 2 large boneless, skinless chicken breasts
Combine marinade ingredients in a ziptop baggie and mix well before adding the chicken breast. Refrigerate for several hours or up to 2 days, flipping every 12 hours.
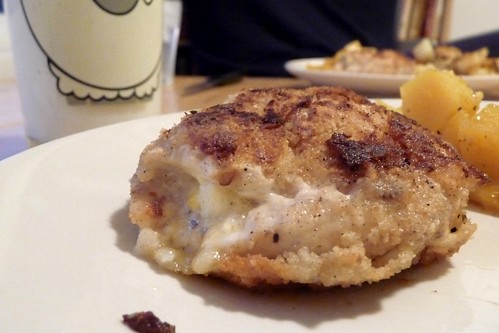
When ready to cook, remove chicken and discard marinade. Over moderate heat, saute chicken until golden brown.
If using for tacos: Remove and shred with either your fingers or two forks.
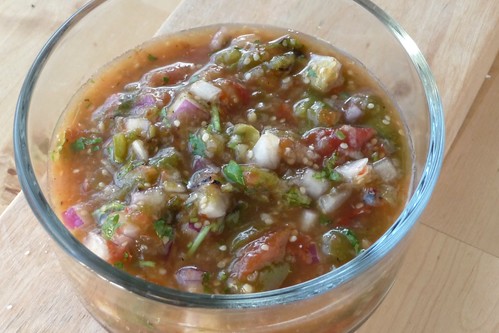
This is a fairly typical salsa verde. It's fairly smooth which makes it a great sauce to pour over tacos, chicken, burritos, enchiladas, and so on, but I wouldn't try to eat it with chips.
Makes about 1 1/2 cups
- 1/2 lb (200g) tomatillos, washed and papery husks removed
- 1 small (100g) tomato
- 3 cloves roasted garlic, crushed
- 1 tsp salt
- 1 - 2 jalapenos
- juice and zest of 1/2 lime
- 1/4 c red or white onion, finely diced
- 1 tbsp cilantro, minced
Halve tomatillos and tomatoes and arrange in a single layer on a baking sheet along with the whole jalapeno(s). Broil 4 - 6 inches from the heat for about 5 minutes until nicely roasted with black spots. Flip everything over and broil for an additional 4 - 5 minutes until the other side is nicely roasted as well.
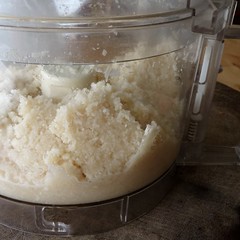
Place jalapenos in a paper bag and let them steam for a few minutes. Remove the skin (it should flake or peel right off). Remove the stem (and seeds, if desired). Combine tomatillos, tomatoes and jalapenos in a food processor or blender. Pulse a few times to puree (some chunks are good) and remove to a bowl.
Combine remaining ingredients with tomatillo-pepper puree. Adjust seasoning to taste. Let rest for 30 minutes to allow flavors to blend.

From Suzanne McMinn (Chickens in the Road): "Making Flour Tortillas"
Makes 6 6" tortillas
- 1.5 cups all-purpose flour
- 1 teaspoon baking powder
- 1/2 teaspoon salt
- 1.5 tbsp lard (or shortening, i.e., Crisco)
- 1/2 cup milk
In a medium bowl, stir together dry ingredients. Cut in lard with a fork, fingers or a pastry blender. Stir in milk and mix together well with a spoon until it becomes difficult, then begin kneading by hand. It will be dry at first, but don't despair. Keep kneading it until the dough comes together. Cover the bowl and allow it to rest for about 20 minutes. The dough should be pliable and not very sticky.
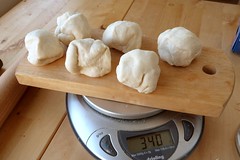
Sprinkle some flour over and knead it in briefly. Divide the dough into six equal balls.
I used a silicone baking mat to roll my dough out on, which helped as I could see that the dough did not need any additional flour picked up from the board. If you don't use something non-stick, like the counter, a pastry board or waxed paper, you probably will need to sprinkle a bit of flour to prevent sticking.
Roll out each dough ball as thin as possible without breaking or ripping the dough. (Vaguely tortilla-shaped is okay too! Amoeboid-tillas taste just as good.) If it sticks, use more flour. Set finished tortillas aside, separating into layers using waxed paper or cellophane or hand them off to your honey to cook while you flatten another out.
Heat a cast-iron skillet over medium-high heat. No oil is used with tortillas, so doing this can be detrimental to non-stick pans. Don't worry, the tortillas won't stick, especially if your pan is well-seasoned. (We cook bacon in ours almost every day and it's slick as can be.)
Cook each tortilla for about 30 seconds on each side. They'll probably shrink a bit as they puff up nicely and develop browned spots. Remove and keep warm under/inside foil while you cook up the rest. (And remember, if one doesn't come out nicely, it can go to the "dog". Woof!)
Notes:
- Please visit Suzanne's blog for step-by-step photos and the recipe for making thin tortillas, not to mention lots of goats, chickens and big puppies!
I haven't been posting many pictures lately, I know. I've been having trouble getting my shots to come out well, partially because the days are shorter and the light I usually depended on in the summer is now well before dinnertime. This time, I was able to scrounge up enough afternoon sunlight to do the job.
When I went through the pantry, I noticed we didn't have enough tequila to make another set (or even one) of margaritas. I don't have the room for two bottles of tequila until we have margaritas again, so Tequila Lime Chicken Tacos went on the menu. Now, this chicken recipe is good just on its own with a salsa topping, but mmm.. fresh, homemade tortillas... Gotta be taco night!
Tacos need salsa, however. Since I also scored some tomatillos from a local garden recently, a salsa verde seemed in order.
Tomatillos are tart green tomatoes with a papery husk, which is why you might know them as husk or ground tomatoes. They're usually used for salsa verdes (lit., green sauce) in Mexican cuisine, sometimes raw, sometimes roasted. For those of you who don't have tomatillos available fresh, you might be able to find them canned in the international/Mexican section in your grocery. If you don't have tomatillos at all, you can substitute green or plum tomatoes plus a dash of lemon juice.
According to foodsubs, cape gooseberries, which I had in Latvia where they're known as fizālis, are acceptable substitutes as well, but if they're very sweet, I would still add some lemon or lime juice as well.
(Personally, I'm thrilled that I finally know what these little golden guys are called. I usually had them at restaurants and cafes where they seemed to decorate the majority of desserts. We don't have cape gooseberries in my region of America so I had no idea what they were.)
Okay, enough babble. Let's cook!
Tequila Lime Chicken Tacos
1 recipe Tequila Lime Chicken (recipe follows)
1 recipe Roasted Tomatilla Salsa (recipe follows) or your favorite salsa
1 recipe Thick & Fluffy Flour Tortillas (recipe follows) or other tortillas
refried beans and/or mexican rice
cheese - shredded or crumbled (such as queso fresco, queso oaxaca, etc.)
limes
shredded green or napa cabbage
I like to build my tacos with shredded meat, cabbage, cheese and salsa, plus a twist of lime, leaving the beans and rice for side dishes. However, tacos are flexible. They don't mind how you put them together.
Tequila Lime Chicken
Most of the work here is in the marinade. After that, it's just frying it up and shredding it. Or, leave the breasts whole and drizzle the Roasted Tomatillo Salsa over them.
Serves 2 - 3 if shredded. Marinade will accommodate 2 whole boneless breasts.
Marinade
2 tbsp teriyaki sauce
juice of 1 lime
1 tbsp (3 cloves) garlic, crushed
2 tbsp tequila
1 tsp oregano
1/2 tsp ginger
1 large boneless, skinless chicken breast
Combine marinade ingredients in a ziptop baggie and mix well before adding the chicken breast. Refrigerate for several hours or up to 2 days, flipping every 12 hours.
When ready to cook, remove chicken and discard marinade. Over moderate heat, saute chicken until golden brown.
If using for tacos: Remove and shred with either your fingers or two forks.
Roasted Tomatillo Salsa
This is a fairly typical salsa verde. It's fairly smooth which makes it a great sauce to pour over tacos, chicken, burritos, enchiladas, and so on, but I wouldn't try to eat it with chips.
Makes about 1 1/2 cups
1/2 lb (200g) tomatillos, washed and papery husks removed
1 small (100g) tomato
3 cloves roasted garlic, crushed
1 tsp salt
1 - 2 jalapenos
juice and zest of 1/2 lime
1/4 c red or white onion, finely diced
1 tbsp cilantro, minced
Halve tomatillos and tomatoes and arrange in a single layer on a baking sheet along with the whole jalapeno(s). Broil 4 - 6 inches from the heat for about 5 minutes until nicely roasted with black spots. Flip everything over and broil for an additional 4 - 5 minutes until the other side is nicely roasted as well.
Place jalapenos in a paper bag and let them steam for a few minutes. Remove the skin (it should flake or peel right off). Remove the stem (and seeds, if desired). Combine tomatillos, tomatoes and jalapenos in a food processor or blender. Pulse a few times to puree (some chunks are good) and remove to a bowl.
Combine remaining ingredients with tomatillo-pepper puree. Adjust seasoning to taste. Let rest for 30 minutes to allow flavors to blend.
Thick & Chewy Flour Tortillas
From Suzanne McMinn (Chickens in the Road): "Making Flour Tortillas"
Makes 6 6" tortillas
1.5 cups all-purpose flour
1 teaspoon baking powder
1/2 teaspoon salt
1.5 tbsp lard (or shortening, i.e., Crisco)
1/2 cup milk
In a medium bowl, stir together dry ingredients. Cut in lard with a fork, fingers or a pastry blender. Stir in milk and mix together well with a spoon until it becomes difficult, then begin kneading by hand. It will be dry at first, but don't despair. Keep kneading it until the dough comes together. Cover the bowl and allow it to rest for about 20 minutes. The dough should be pliable and not very sticky.
Sprinkle some flour over and knead it in briefly. Divide the dough into six equal balls.
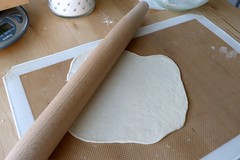
I used a silicone baking mat to roll my dough out on, which helped as I could see that the dough did not need any additional flour picked up from the board. If you don't use something non-stick, like the counter, a pastry board or waxed paper, you probably will need to sprinkle a bit of flour to prevent sticking.
Roll out each dough ball as thin as possible without breaking or ripping the dough. (Vaguely tortilla-shaped is okay too! Amoeboid-tillas taste just as good.) If it sticks, use more flour. Set finished tortillas aside, separating into layers using waxed paper or cellophane or hand them off to your honey to cook while you flatten another out.
Heat a cast-iron skillet over medium-high heat. No oil is used with tortillas, so doing this can be detrimental to non-stick pans. Don't worry, the tortillas won't stick, especially if your pan is well-seasoned. (We cook bacon in ours almost every day and it's slick as can be.)
Cook each tortilla for about 30 seconds on each side. They'll probably shrink a bit as they puff up nicely and develop browned spots. Remove and keep warm under/inside foil while you cook up the rest. (And remember, if one doesn't come out nicely, it can go to the "dog". Woof!)
Notes:
1. Please visit Suzanne's blog for step-by-step photos and the recipe for making thin tortillas, not to mention lots of goats, chickens and big puppies!