Happy Halloween!

Halloween Pumpkins

Happy Halloween!

Did you carve something fun? My husband thought up a Tram of Death for his pumpkin, while I followed a Spooky House pattern for mine. It was, as always, a lot of fun to carve pumpkins and we got a huge bowl of seeds out of it to roast. (Don't forget to roast your pumpkin seeds.)

For the observant, Grace makes a cameo.

Everyday Pumpkin Pie

Pictures are worth a thousand words, but unfortunately, it's all words today. I forgot my camera when I was making the pie and after, well, it disappeared awfully fast.

Pumpkin pie is arguably one of my favorite pies. It's not the favorite, that's a Boston Cream, but it's pretty high up on the list. Part of it is due to the fact that you can only really get good pumpkin pies for a few months each year, so anticipation factors in.

Now, as I mentioned yesterday, it's taken me a while to make my own pie completely from scratch, pumpkin and all. To be fair, my go-to recipe for years has been the recipe on the back of the Libby's pumpkin can. It's a great recipe, with excellent color and texture, but it just wasn't quite what I wanted this time.

This version of pumpkin pie came out beautifully, but I'm not sure it's the best it could be. I have some ideas that I'll play around with this holiday season, some tweaks I want to make. But this recipe is an excellent "Everyday Pumpkin Pie" and quite fast and easy to put together. It's certainly a pie I could whip up on the spot for a potluck or an unexpected family dinner, as long as I had some pumpkin puree tucked away in my freezer.

You need a 9" pie crust to make this. You can use store-bought in a pinch, but if you have an extra 40 minutes, I would make the pie crust from scratch. It really is better than anything frozen in the grocery! My favorite, time-tested and KitchenMouse-approved pie crust recipe is from Alton Brown. I'll be baking more pies this holiday season, including a pecan pie for my dad, and this is my favorite crust to use because it's damn near foolproof, beautifully flaky and extremely tasty.

Pumpkin pies are great because you really don't need a mixer, not even a hand mixer, to bring the filling together. If your pumpkin is sufficiently roasted and mashed, believe me, all you need is a spatula and a big bowl.

Everyday Pumpkin Pie [printable recipe]

Adapted from Fewel Farms
Makes 1 9" pie

  • 1 unbaked 9" pie shell1
  • 1 1/3 cups / 375 grams / 13.25 oz Roasted Pumpkin Puree
  • 14 oz can + 1 tbsp sweetened condensed milk (about 1 1/3 cups)
  • 1/2 cup hot water
  • 1 egg, beaten
  • 1 1/4 tsp ground cinnamon
  • 1/2 tsp ground nutmeg
  • 1/2 tsp ground ginger
  • 1/4 tsp ground cloves

Preheat oven to 375F/190C.

In a large mixing bowl, mix together pumpkin and milk until thoroughly combined. Stir in remaining ingredients, mixing well. Pour into the unbaked pie shell.

High altitudes3: Bake for about an hour, give or take 5 minutes. Low altitudes: Bake for 45 - 50 minutes.

The center will still jiggle a little bit, but not much. Cool on a wire rack to room temperature, then refrigerate overnight.

Notes:

  1. Blind-baking the crust isn't necessary for pumpkin pie. Some folks blind-bake, others half-blind-bake, it's your choice. I don't blind-bake my pumpkin pie shells, because with Alton's recipe I haven't had a pumpkin pie turn out soggy2.
  2. Along with the above, I have to note that if your pie pumpkin puree has come out somewhat watery, DRAIN IT. Otherwise, you WILL have a soggy pie. Yuck.
  3. I live approximately 5,000 ft above sea level, so my recipes are adjusted for high altitudes. Baking time should be reduced for those living closer to sea level.

From Scratch: Roasted Pumpkin Puree

It's almost Halloween! Do you have your jack'o'lanterns ready? We have two that we'll carve later this afternoon (I don't like to carve too early so my pumpkins look good on Halloween).

Don't forget: Don't throw away those seeds. Roast them up with some salt or spices for a great treat. (Read more about roasting pumpkin seeds and two ways to flavor them here.)

Along with Halloween, we have Thanksgiving and Christmas coming up, which means lots of pumpkin pie to eat too. (Did I mention I love pumpkins?) In the past, I've gotten pies from Marie Callendar's and Village Inn, both excellent pie/restaurants in Utah. I've made my own pies using Libby's Pumpkin Puree, which is delicious (and just about the only brand sold here, but at least it's good). But I've never made my own completely from scratch.

Now that I have, I don't think I'd go back to either! Pumpkin puree is just too versatile and those cans are so much more expensive. Plus, it's so darn easy to do.

So, today, I'm going to talk about how to make your own pumpkin puree that can be used in making pumpkin pie, instead of using stuff in a can. Tomorrow, I'll post a recipe for making an excellent pumpkin pie using it, along with an easy pie crust.

We picked out a couple of small pie pumpkins (also known as sugar pumpkins). As with all winter gourds, you want firm, heavy-for-their-size pumpkins. No soft spots or evidence of rot or frost.

If you like pumpkin or pumpkin pie, I would roast at least two or three pumpkins at a time. Why waste oven energy? Even one medium pie pumpkin will give you more mash than you need for a single pie, so I recommend storing the rest in 1-cup containers or baggies so you can easily use it for making pumpkin bread or pumpkin polenta (upcoming) or maybe just more pies later on.

For tomorrow's pumpkin pie, you'll need to set aside 375g or 1 1/3 cups of pumpkin mash. Don't worry about keeping in the fridge, it'll last for about 5 days. If you don't use it before then, freeze it for later.

Roasted Pumpkin Puree [printable recipe]

at least 1 pie or sugar pumpkin

Cut pumpkin(s) in half. Scoop out strings and seeds, reserving seeds for roasted pumpkin seeds later. Remove stem. Place cut-side down on a baking pan lined with foil or a silicone mat. Cover with foil and roast at 350F for 90 minutes or until tender.

Allow it to cool until you can handle it comfortably. Peel off the skin (it should peel off easily) and cut pumpkin into chunks. Or, you can scrape out the meat but I found this counterproductive when peeling was so easy. Put the pumpkin chunks into a large bowl. Mash well until no chunks remain.

Pumpkin mash will keep up to 5 days, well wrapped, in the fridge.

Warm Chicken Spinach Salad

Warm Chicken Spinach Salad

It snowed during the night. The trees are outlined in white, dark branches and trunks providing beautiful contrast. The clouds are already breaking up, blue sky to the south growing bigger every time you look away. Winter is finally here.

But that doesn't mean that I'll give up salads, like the fantastic warm spinach, chicken and mandarin salad below. Warm salads, along with soups and stews, will become everyday staples again, now that it's cold and running the oven becomes a pleasure. The temperatures are hovering right above freezing for the next few days. I've been waiting patiently for Winter so I can enjoy the dishes that are misery to cook in any other season.

In any case, this warm salad is a wonderful dish to eat while baking or watching the snow or leaves fall. I hope it brightens your gloomy day as much as it did mine.

Warm Chicken Spinach Salad [printable recipe]

Adapted from a recipe on AllRecipes.com
Serves 2

  • 3 cups torn fresh spinach
  • 1 small can mandarin oranges, drained
  • 1 medium avocado
  • 3 slices red onion, halved
  • 6 - 8 ounces skinless, boneless chicken breast halves - cut into strips
  • 1/4 cup chopped walnuts
  • 2 tablespoons olive oil
  • 2 teaspoons cornstarch
  • 3 cloves garlic, crushed
  • 1/2 cup pineapple juice
  • 1/4 cup red wine vinegar
  • 1 tsp rosemary
  • salt, pepper

On two salad plates, arrange spinach, oranges, avocado and onion; set aside.

In a skillet over medium heat, saute chicken with rosemary, salt, pepper and walnuts in oil until chicken is no longer pink. Remove to waiting salads.

In a small bowl, combine the cornstarch, garlic, pineapple juice and vinegar until smooth. Add to skillet and bring to a boil; cook and stir for 2 minutes or until thickened and bubbly. Pour over salads and serve.

Buckwheat Pumpkin Bread

Buckwheat Pumpkin Bread

"Hey, neat! Pumpkin bread! Can we try some?"

Sometimes, I forget that my husband hasn't been with me forever. We joke about it all the time; he forgot that I hadn't been with him in Latvia forever when I was living in Liepāja with him. In this case, we were at our favorite grocery store who had a sale on pumpkin bread. He'd never heard of it before, much less tried it, which I immediately promised to rectify.

Pumpkin bread, like its cousins zucchini bread and banana bread, is extremely popular here in Utah. I remember when our neighbor across the street from the house I lived in as a kid brought over zucchini bread shortly after we moved in from California. Mrs. Webb had zucchini plants and anyone who has ever tried growing zucchini knows what I mean when I say the damn plant grows like a weed. So, she made zucchini loaves for the whole neighborhood several times just to put a dent in the supply. I thought it was great and proceeded to snack on it every chance I had.

The trick was coming up with a recipe that wasn't too sweet. Many pumpkin breads and banana breads suffer from being tooth-rottingly sweet - I've seen recipes call for 3 cups or more of sugar for ONE LOAF. Way, way too sweet. And believe me, if it's too sweet for me, my husband won't make it through a bite. Since he's Latvian, he grew up loving sour foods, not sweet. Most of the commercial and restaurant desserts in America that he's tried are simply too sweet for him.

After a few revisions, I came up with this recipe which I feel has a good balance between sweet and spicy, with just the right amount of savory nuttiness

As for why I used a white sugar + molasses combo: this is how you substitute white sugar for brown when you run out unexpectedly! However, due to the beautiful color of the crust and crumb, I'm not sure I would use the brown sugar. I like the molasses' effect on the bread too much.

Buckwheat Pumpkin Bread

Buckwheat Pumpkin Bread [printable recipe]

Makes 1 loaf

  • 1/2 cup (1 stick or 1/4 pound) butter, softened
  • 1/2 cup white sugar + 1 tbsp molasses OR 1/2 cup brown sugar, packed
  • 2 eggs
  • 1 cup (280g) pumpkin puree
  • 1/2 cup sour cream
  • 1/2 cup buckwheat flour
  • 1 cup all-purpose flour
  • 1 1/2 tsp baking soda
  • 1 tsp cinnamon
  • 1 tsp ginger
  • 1/2 tsp salt
  • 1/2 tsp nutmeg
  • 1/2 tsp ground cloves
  • 1 cup walnuts, chopped and toasted

Preheat oven to 350F.

Cream together butter and sugar. Add eggs. Beat until light and fluffy. Mix in pumpkin, sour cream and spices. Whisk together flour, baking soda and salt. Add gradually until thoroughly combined. Stir in walnuts.

Pour into a greased and floured loaf pan and bake for 50 - 55 minutes. A toothpick inserted in the center should come out clean when finished. Cool in the pan for 5 - 10 minutes, then turn out onto a wire rack. Cool completely before slicing.

If using mini-bundt pans or mini-loaf pans, adjust baking time to about 35 - 45 minutes.

Žāvētu augļu un dzērveņu kompots (Cranberry-Mixed Fruit Kompots)

Kompots

Every week I post one recipe from Latviešu ēdieni.

I've talked a little bit before now about my stay in a Latvian hospital. One of the things they gave me with my first meal was a hot sweet drink called kompots. I wrapped my hands around the steaming mug and inhaled the essence of spicy tart apples. I sipped, the warm, almost sticky liquid sliding down my throat and setting the butterflies in my stomach at ease. I looked up at my husband, "What is this? We have got to make this!" He laughed and told me he was glad I liked kompots.

Kompots is a simple drink made from dried fruit, water and sugar, along with a bit of citric acid or dry white wine. It can be served both hot and cold, the latter with whipped cream floated on top. In this one, we used cranberries to add the necessary acid, but you could use oranges or wine as well. It's easy to make since most of the "cooking" is unattended soaking of one form or another -- which makes it a great choice for making while you prepare a lot of other holiday dishes. This is one of the dishes I'll be making for Thanksgiving!

I'm so glad to see fresh cranberries in stores finally. So many Latvian recipes make use of this tart little berry but finding them in my area, even frozen, outside of the next two months is next to impossible. We bought a bag and once the holiday season is in full swing (and the sales start popping up), we'll be putting away several bags to use throughout the rest of the year. I love having a chest freezer! My food budget's been slashed with all of the food we were able to sock away at the end of summer. But that's another post.

If you need a flavorful, not too sweet, and oh so delicious alternative to the typical punch or 'nog this holiday season, give kompots a try.

Cranberry-Mixed Fruit Kompots [printable recipe]

Adapted from Latviešu ēdieni
Makes about 1.5 liters

  • 80 g prunes, chopped
  • 70 g fresh cranberries, finely chopped
  • 40 g dried apples (with no added sugar)1, chopped
  • 40 g raisins
  • 60 g sugar
  • 1 1/2 l water

In a medium pot, combine prunes and apples. Pour in the water and let soak until rehydrated (about 20 minutes). Bring to a boil, add sugar, then reduce heat and simmer, covered, for about 15 minutes. Stir in raisins and continue to simmer for another 5 minutes. The fruit should be very soft. Remove from heat and stir in cranberries. Let stand for 10 - 20 minutes.

Serve warm as-is or cold with a bit of sweetened whipped cream.

Notes:

  1. Really. I mean it! You don't need sweetened dried fruit for this - it throws the sugar balance all out of whack. We used Bare Fruit Dried Apples which worked beautifully.

Miso-Glazed Thresher Shark Steaks

Last week, shark was on sale. I've only had shark once and my husband, never. So, we picked up a loin steak because it looked fabulous and carted it home for dinner that night.

That turned out to be a fantastic idea. The shark was extremely moist and flavorful, "sharky" but not overly so. Definitely worthwhile.

Miso-Glazed Thresher Shark Steaks [printable recipe]

Adapted from Cooking Light
Serves 2

  • 1 lb thresher shark loin steak, about 1" thick
  • 3 tbsp miso
  • 3 tbsp soy sauce
  • 3 tbsp brown sugar
  • 3 tbsp hot water
  • 2 cloves garlic, crushed
  • 1/2 tsp ginger
  • 2 green onions, minced

Combine miso, soy sauce, sugar and water in a ziptop bag or shallow dish. Add shark, turning to coat all sides. Marinate in the fridge for at least 1 hour.

Remove shark to a baking dish, pour over remaining marinade. Broil 4 to 6" away from heat for 5 minutes per side or until it flakes.

Sprinkle with green onions and serve.

Last week, shark was on sale. I've only had shark once and my husband, never. So, we picked up a loin steak because it looked fabulous and carted it home for dinner that night.

That turned out to be a fantastic idea. The shark was extremely moist and flavorful, "sharky" but not overly so. Definitely worthwhile.

Miso-Glazed Thresher Shark Adapted from Cooking Light

1 lb thresher shark loin steak, about 1" thick 3 tbsp miso 3 tbsp soy sauce 3 tbsp brown sugar 3 tbsp hot water 2 cloves garlic, crushed 1/2 tsp ginger 2 green onions, minced

Combine miso, soy sauce, sugar and water in a ziptop bag or shallow dish. Add shark, turning to coat all sides. Marinate in the fridge for at least 1 hour.

Remove shark to a baking dish, pour over remaining marinade. Broil 4 to 6" away from heat for 5 minutes per side or until it flakes.

Sprinkle with green onions and serve.

Roasted Veggie Salad

Roasted Veggie Salad

It's a grey and soggy day outside. The kind of day that makes you wish for a soft blanket, a warm cat and a hot cup of cocoa to accompany that great page-turner of a book you'd been meaning to read all this time. It's definitely the kind of day to run the oven for a while.

This one is my go-to salad when I want something really hearty and veggie-heavy. I love to mix it with the creamy, salty feta my Greek landlord carries for her family and friends. It can be a side or a main if you add some orzo or potatoes. (I'd use reds or Yukon golds for this one rather than russets.)

However, don't forget the dressing. It just wouldn't be the same without the lemony-garlic tanginess.

Roasted Veggie Salad

Roasted Veggie Salad [printable recipe]

Adapted from Cuisine at Home's Weeknight Menus

  • 1 small red onion, roughly chopped
  • 6 oz / 170g crimini, chanterelle or other flavorful, meaty mushroom, roughly chopped
  • 1/2 zucchini or yellow summer squash, sliced into half-moons
  • 1/2 red bell pepper, roughly chopped
  • 2 - 3 small ripe tomatoes, quartered
  • 1/4 cauliflower or broccoflower, roughly chopped
  • 1 - 2 sprigs fresh rosemary or thyme OR 1 tsp dried
  • salt, pepper
  • feta cheese, crumbled
  • fresh parsley, finely chopped
  • 2 tbsp olive oil
  • Lemon-Garlic Vinaigrette (recipe follows)
  • OPTIONAL: potatoes or orzo (see Variation below)

Preheat oven to 425F/220C.

Toss all veggies with olive oil, rosemary or thyme, salt and pepper and arrange in a single layer on a sheet pan. Roast for 25 minutes.

Toss roasted veggies with vinaigrette and sprinkle over with feta cheese and parsley. Serve.

Variation with Potatoes or Orzo

  • 2 - 3 red or Yukon gold potatoes, chopped into bite-size pieces
  • 1 - 2 tbsp olive oil
  • 1 sprig fresh rosemary, finely chopped
  • 4 cloves garlic, sliced
  • OR
  • 1 cup orzo pasta
  • 3 cups water or your favorite stock

For potatoes: Prior to roasting the veggies, toss potatoes with olive oil, rosemary and garlic. Arrange potato mixture in a single layer on the sheet pan. Roast for 30 minutes, stirring once. Remove from oven and follow Veggie Salad instructions above, making sure to combine veggies and potatoes well.

For orzo: Just prior to putting the veggies in the oven, bring liquid to a boil in a saucepot. Salt the water and add the orzo, bringing it back to a boil. Reduce heat to low, cover and simmer for 25 minutes while the veggies roast. Strain orzo and combine with veggies before serving.

Lemon-Garlic Vinaigrette [printable recipe]

Also adapted from Cuisine at Home's Weeknight Menus

  • 1/3 cup red wine vinegar
  • 2 cloves garlic, crushed or minced
  • 1 shallot, minced (optional)
  • 3 tbsp fresh basil, minced
  • 1 tbsp lemon juice
  • 1 tsp Dijon or spicy brown mustard
  • 1 tsp salt
  • 1/2 tsp pepper
  • 1 cup olive oil

Combine all ingredients, whisking well. (Alternatively, use a mini food processor or blender and drizzle in the oil while blending to emulsify well.)

From Scratch: Chicken Stock

Chicken Stock

For last week's challenge, I needed some chicken stock. I could buy some, but really, why? Making stock is super-easy and mostly unattended. It's a good way to spend a Sunday afternoon, especially if it's a rainy one like the day we made this batch.

Now, I could have made the long version of Jaden's Pho but at the time, I had no idea how well it would come out or if we would like it well enough to keep extra pho stock on hand. So, instead, I put together a recipe for a very basic chicken stock that would work well in being flavored for pho.

Many chicken stocks call for thyme and I agree - fresh thyme is a wonderful thing. I'm going to try growing it again eventually but for now, acquiring some is about a 50 mile round trip journey and frankly, I needed to use up the last of the fresh rosemary. Use what you have and if you don't have fresh, use dried. It'll still work, though it won't be as nice.

Basic Chicken Stock [printable recipe]

Makes 8+ cups

  • 3 chicken leg quarters (about 2 pounds) or equivalent amount of chicken thighs and wings or wing tips
  • 1 onion, quartered
  • 2 carrots, roughly chopped
  • 4 sprigs fresh rosemary or thyme
  • 4 - 5 green onions or 1 leek, green tops included
  • 1 tbsp whole peppercorns
  • 1/2 head garlic, peeled
  • 1/4 cup white wine
  • salt
  • olive oil

Cut apart the leg quarters at the joints and leave the skin on. In a large skillet, heat the oil over medium heat and fry the chicken quarters with a bit of salt and rosemary until nice and brown. Remove those to a large stockpot and cover with water. Start heating the water on high.

Add a bit more oil to the pan and dump in the onions, garlic, carrots and leek or green onion. Here you want the flavorful tops, so don't throw out the leek tops if you're using that. Saute the veggies until they get a bit of color then dump them into the water with the chicken. Deglaze the pan with white wine and when all the browned bits (the "fond") have been scraped up, dump the resulting mixture into the pot.

Add the peppercorns along with the rest of the rosemary. Make sure there's enough water to cover everything by about an inch. By now it should be getting close to simmering. Bring it to a full boil, then cover it and let it simmer for 2 - 3 hours.

Every so often, skim the fat and other impurities from the surface. Using a fine-meshed sieve, drain the stock into a large bowl or container. Throw away all of the veggies -- trust me, they've given their all. Strip the meat from the bones and reserve for some other recipe needing boiled chicken, like chicken noodle soup or chicken salad.

Let the stock cool to room temperature then refrigerate overnight. The next morning, remove any fat that's solidified at the top. Pour into smaller (1 or 2 cup) containers and freeze, making sure to leave enough headroom.

Daring Cooks Challenge: Dessert Wontons

Filled Dessert Wontons

I love deep-fried food but I hate deep-frying. (My body doesn't appreciate it very much when I eat deep-fried food either, but it allows me to indulge on rare occasions if I'm moderate in my indulgence.) Deep-frying, however, is scary.

Filled Dessert Wontons

For this challenge, I gritted my teeth, dug up the candy/frying thermometer, my small pot (to limit the damage done to my oil bottle if things went badly) and... completed the challenge! It wasn't so bad, really. The thermometer helped a lot (duh.). Previously, I was trying to do it the way my mom had shown me with bubbles and a wooden spoon, but I don't have her experience and when I tried it, I got severely oil-soggy onion rings. Blech.

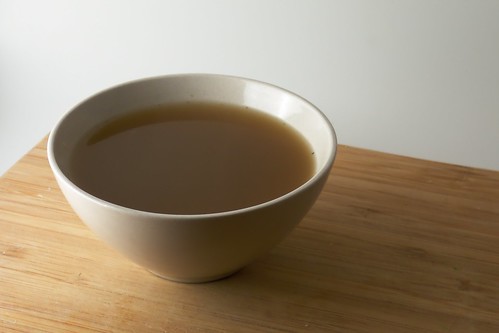
As I noted in the Pho recipe below, we didn't have much license to play around with the soup. Instead, we were given two challenges: Prepare the Pho as directed and prepare dessert wontons for dessert. The wontons could have any filling we could think up, any shape, you name it.

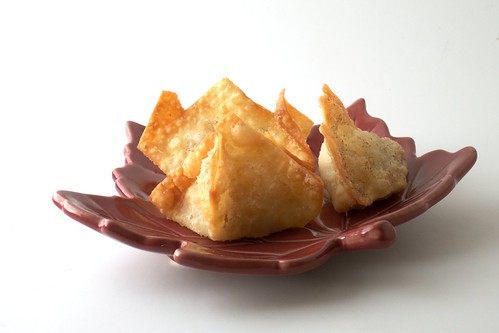
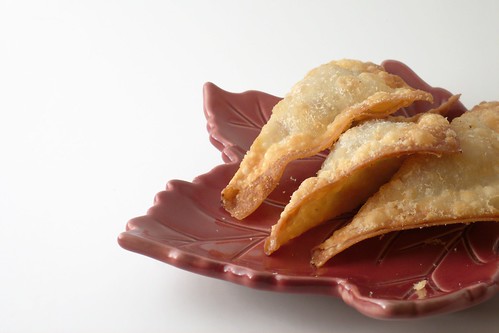
Now that was fun. I like creative challenges like this that allow me to play around with something on a theme. So my husband and I sat down at the table and started putting together all sorts of little odd packets.
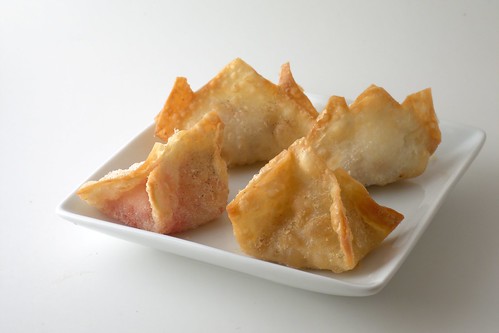
Filled Dessert Wontons

We made: - Apple "Strudel" - Apple "Cheesecake" (apple filling with quark) - Raspberry-pear "Cheesecake" (raspberry-pear preserves with quark) - Quark with walnut honey - Quark with honey - Quark with semi-sweet chocolate chips

We made fresh buttermilk quark for the challenge and combined teaspoonfuls with the apple filling, some fresh raspberry-pear preserves and walnut honey for a kind of "cheesecake" feel. Worked out better than I expected! I'll write about the new and improved quark soon, it's taken some refinement to get it down to a reliable process.

As for walnut honey, I picked it up in Latvia. It's neat stuff to snack on, honey mixed with whole walnuts. Mmm. You can replicate it by taking a strong, raw and unfiltered honey (like buckwheat honey or fireweed honey) and mixing it with halved walnuts.

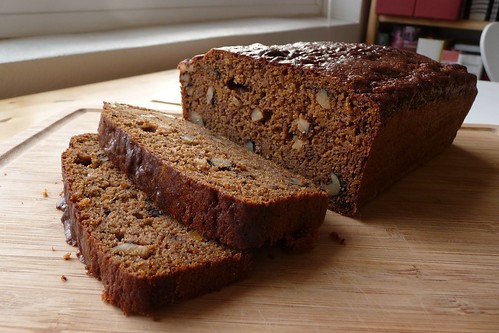
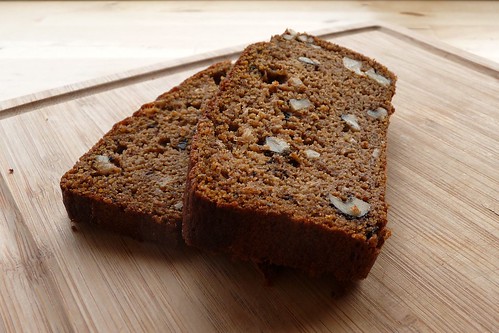
The apple filling I made because our apple tree went bonkers this year. Even with my landlord suddenly having a fit and hacking half the tree off earlier this summer, we picked several pounds of ripe apples the day we made this and several more pounds over the next several days.

Sorry for the lack of precision in the recipe today. I didn't really write anything down, just cooked off the top of my head. I wanted something a bit dry for the filling so it wouldn't explode out of the wrapper yet sweetly caramelized. It worked really well but sadly, as much as I'd love to share, I can't offer Apple Strudel Wontons for download. ;-)
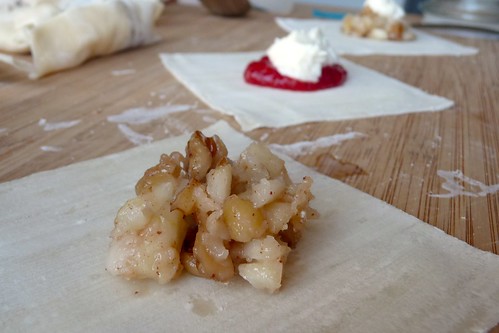
Dessert Wontons in Progress

Apple Filling

  • 3 small apples, peeled, cored, finely chopped
  • 2 tbsp butter
  • 1 tbsp or so of flour
  • 1 tbsp sugar
  • small handful of walnuts, chopped
  • 1 tbsp or so of lemon juice

Over low heat, melt butter. Combine apples with remaining ingredients. Cook apple mixture until tender, somewhere around 10 - 15 minutes.

Notes:
  1. You know what would be good in the apple filling? Rum-soaked raisins.
  2. This would probably make a really good tart filling. Or to top little puff pastry rounds set in mini muffin cups and bake for 15 - 20 minutes.