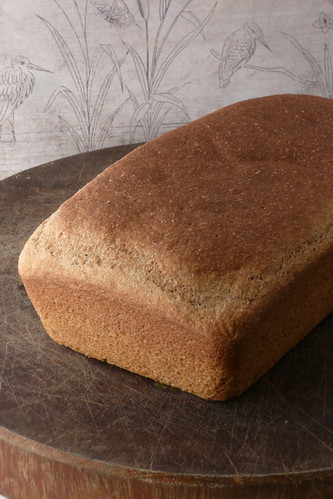
Graham Bread

Those of you who follow me on Twitter probably saw my comments about a bread I baked that came out beautifully. Today, I'll share the recipe. :)

The recipe is from an excellent book on breadmaking by James Beard that I found at the local thrift store for $2. (I love thrifting!) As I also mentioned on Twitter, I'm very tempted to work my way through it because so far, everything either my husband and I have tried has come out beautifully.

I don't have pictures because I forgot to take them before I sliced up the second (and more photogenic) loaf... but then again, pictures don't do it justice. It looks like a wheat bread like many others -- you can't smell the heavenly wheaty scent that rises from a freshly toasted slice nor taste it with some orange blossom honey drizzled over.

Poor you.

So you'll just have to make this then so you get the full experience. No worries, I'll wait right here.

Graham Bread [printable recipe]

Adapted for 2 loaves from Beard On Bread

  • 3 1/2 tsp instant yeast1
  • 2 tbsp sugar2
  • 12 oz warm water (between 100° and 115° F)
  • 8 oz evaporated milk
  • 1 1/2 oz butter, melted
  • 1 1/2 tbsp salt
  • 2 cups graham flour3
  • 3 - 4 cups all-purpose flour

In a large mixing bowl, combine graham flour, salt, sugar and yeast. Pour the water, milk and butter on top. Beat well and add in all-purpose flour a cup at a time until it comes together into a firm dough.

Turn the dough out onto a floured board and knead for 10 minutes until it is smooth and elastic. Or, use a stand mixer fitted with a dough hook to do the kneading - it will take slightly less time and much less effort.

Form the dough into a ball and place into a lightly oiled bowl. Cover lightly with a clean towel and let it rise in a warm place until doubled (about 1 hour or two). Punch down the dough and cut in half.

Grease two 9x5x3" loaf pans4 well. Shape the dough pieces into loaves and arrange in the tins. Cover them back up with the towel and let them rise again until doubled (another hour or so). Slash the tops.

Bake in a preheated oven at 425° F for 10 minutes then reduce the heat to 350° F. Bake for 30 - 35 minutes. (The loaves will sound hollow when done or you can check their temperature - they should be at 190°F.) Let cool in the pans for 5 minutes, then turn out onto racks to cool completely. Slice and serve.

Notes:

  1. Instant yeast does not need to be proofed. It's wonderful stuff. If you use active dry, you will need to proof it in the warm water with the sugar for 5 minutes before continuing with the recipe. Also, use 4 tsp of active dry.
  2. Or honey, which is what I wished I had done and will do differently next time.
  3. Whole wheat can be substituted for graham, which is coarser because the different parts of the wheat are ground separately then remixed. You can make it yourself, according to Wikipedia by mixing all purpose flour with wheat bran and wheat germ. For this recipe, you would need to mix 170 g all-purpose (about 1 1/3 cups) with 30 g wheat bran (about 1/2 cup) and 5 g (3 tsp) wheat germ. Graham flour is very coarsely textured.
  4. This dough is firm enough, according to Beard, that you can just make free-form loaves if you don't have or don't feel like using loaf pans.
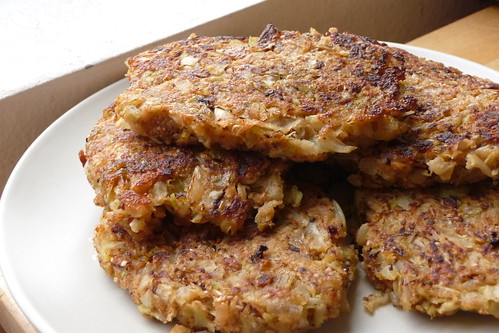
Cabbage Latkes (or.. Kāpostu kotletes)

Cabbage Latkes

Sorry about the delay on this one.. I had everything written and then we had computer problems. It took a while to resolve them so that I could rescue the photos I took of these for the post.

You know how I said we overbought carrots a few weeks ago? We kinda did the same thing again... but with cabbage. We eat a lot of cabbage (one, it's tasty, two, it fills you up cheaply, both calorie-wise and cost-wise, and three, I have difficulty eating lettuce) and since Rancho has good, fresh cabbage all the time for a good price, we bought a couple of heads. Twice.

So, we needed something that would use up some cabbage and wasn't a salad.

Now, for some reason, cabbage doesn't get a lot of love from American cookbooks. Oh, sure, it's in there, but often as a garnish or on tacos if it's not just relegated to coleslaw.

We found what we were looking for in the updated English version of Latviešu ēdieni, Latvian National Cuisine: Cabbage patties.

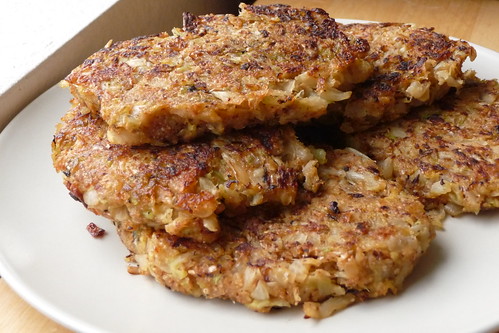
Except I had to rename them. When we had them the first time, they tasted just like fantastic latkes but a little sweeter. And they're definitely not as calorically dense as real potato latkes; the entire recipe, if you were to sit down and eat the whole batch, would cost you under 400 calories.

Cabbage Latkes

Cabbage Latkes [printable recipe]

Adapted from Ņina Masiļūne - Latvian National Cuisine
Serves 2 as a main, 4 as a side

  • 500 g / 17.5 oz green cabbage
  • 1/4 cup farina1 or finely ground bread crumbs
  • 1 medium onion
  • 1 egg, beaten
  • 2 cloves garlic, crushed
  • 2 tbsp oil or butter, divided
  • salt
  • bread crumbs - OPTIONAL

Grate the cabbage and onion on a box grater or mandoline into fine shreds. Keep the two separate.

If you have a food processor, fit it with the grating disc and grate each separately.

Using a potato masher or stomper, press the cabbage until it becomes juicy.

In a deep skillet over moderate-low heat, saute cabbage. Stir often -- without fat, it will be easy for it to burn -- until the juice evaporates. Stir in the farina and heat for 15 - 20 minutes, or until the mixture pulls away from the pot. Let cool.

Using a tablespoon of butter, saute the onion and garlic with a pinch of salt until browned. Remove from heat and stir into cabbage mixture.

OR... You can saute the cabbage, onion and garlic together at once with a tablespoon of butter or oil and a pinch of salt. It's a bit easier and makes less work.

Let cool briefly, then add the beaten egg, mixing well. Shape the mixture into small patties and saute in remaining tablespoon of oil, flipping once, until golden brown and delicious.

These are great just as they are, but you can also dredge the little patties in bread crumbs and fry them up that way.

Serve with sour cream.

Notes:

  1. Farina is best known as Cream of Wheat in the US. Latvians know it as manna.

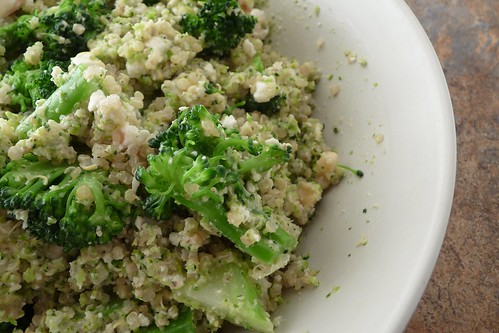
Double Broccoli Quinoa

Double Broccoli Quinoa

This one has been sitting around in my drafts folder for a while. I had forgotten about posting it until Scorpio Woman asked on Twitter about yummy things to dress up quinoa.

Ever since Winco came to Utah, we've been able to easily (and cheaply) get all these fun grains to try. Quinoa, though it can be pricier than some of the other grains we eat, is delicious. As with rice, I cook it in my rice cooker for a quick and easy dinner component -- we don't often eat quinoa plain, but almost always with lots of additions or as part of something like a salad or tabbouleh.

Broccoli Pesto

Now, I love pesto. It's one of the reasons why I started growing basil a couple of years ago (and am starting two more varieties this year!) but I've never tried using a vegetable as the main "green" component. The results? Tasty and a great way to get your veggies in -- I daresay that it would fool a kid. I used some of the leftover pesto (there will be, it makes a lot) to make pesto chicken sandwiches with some grilled chicken, monterey jack cheese and red onion on ciabatta rolls.

This recipe from 101 Cookbooks doesn't require quinoa -- many other grains would work just as well. I used a mix of quinoa and bulgur since I didn't have much on hand that night. In my area, broccoli is starting to go on sale again and I expect I'll be making this again!

Double Broccoli Quinoa [printable recipe]

Adapted from 101 Cookbooks

  • 3/4 cup dry quinoa or bulgur or a mix of the two
  • 1 1/2 cups veggie stock
  • 2 broccoli crowns (about 5 - 6 cups), cut into small florets
  • 3 - 4 large garlic cloves
  • 2/3 cup chopped walnuts, toasted (divided)
  • 1/3 cup freshly grated Parmesan
  • 1/2 tsp salt
  • 1/4 tsp crushed red chile flakes
  • 2 tablespoons fresh lemon juice
  • 1/4 cup olive oil
  • 1/4 cup light cream or half-n-half
  • crumbled chevre (goat cheese)

Cook quinoa in a rice cooker with veggie stock until done. Heidi at 101Cookbooks notes to cook it on the stovetop, simply bring the stock to a boil, add the quinoa then reduce to a simmer. Cook for 15 minutes or until the curlique in the grains is visible, remove from heat and strain if necessary.

Blanch the broccoli in a pot of boiling water for one minute, remove with a spider. Transfer to a colander or sieve and run cold water over it to stop it from cooking.

Process 2 cups of cooked broccoli pieces, garlic, half of the walnuts, cheese, salt, red pepper flakes and lemon juice until finely chopped. Slowly pour in oil and cream while the machine is running until the pesto comes together into a smooth, creamy mass.

Toss quinoa and remaining broccoli with about 1/4 to 1/3rd of the pesto. Crumble the chevre and sprinkle it and the remaining walnuts over the quinoa. Toss everything together, taste and adjust quantities as needed.

For those that are dairy-free, you should be able to easily substitute soy, rice or nut milks for the cream and omit the Parmesan.

Easy No-Knead Whole Wheat Bread

Easy No-Knead Whole Wheat Bread

I'll be the first to admit: I am not much of a baker.

I have my favorite recipes, naturally, that work for me, like the wonderful-yet-complicated french bread that I adore, even if I don't make it often because it takes the entire afternoon.

Yet sandwich bread has been elusive. The crumb would be too dense. The crust, too soft. Sometimes I'd even get a brick. (Good for breadcrumbs anyway.)

Finally, I turned to a book that has been unfairly languishing on the shelf: King Arthur Flour Whole Grain Baking: Delicious Recipes Using Nutritious Whole Grains. I flipped through it and realized that I could finally try the recipes out now that Winco and their wonderful bulk section was available to me. (Bob's Red Mill products are available in my town but whoooooo boy are they ever expensive! By contrast, Winco sells the same products bulk and at a reasonable price, so I can finally try many of the different flours.)

And I came across this one. It was a no-knead bread, which has given me problems in the past, but it didn't call for any extended rising time forgotten in the back of the fridge. In fact, I could make it in about two hours. Now, it doesn't produce the high-rising form of the kneaded loaves, so you wind up with fairly small slices, but it's good enough for Sprats and Avocado Sandwiches.

I mentioned that I'm not much of a baker, right? The first one didn't come out too well because I kinda didn't get the yeast to activate because I used cold milk (whoops). But it was still pretty good, good enough to try again. The second one came out really well. But the third one, the one I show here today, came out the best.

So, here's my advice. Use some fresh juice, just like they call for as it adds some nice flavor. Do use dry milk, or if that's not a possibility, warm up the fresh milk to 110F else the yeast will just continue sleeping. Try sprinkling some seeds or nuts over the top because that's really yummy. And try to resist slicing into it for at least 30 minutes after it comes out of the oven.

Easy No-Knead Whole Wheat Bread [printable recipe]

Adapted from King Arthur Flour Whole Grain Baking: Delicious Recipes Using Nutritious Whole Grains
Makes 1 loaf

  • 1 1/4 cups warm water
  • 1/4 cup orange juice or blend1
  • 3 tbsp dark brown sugar2
  • 12 ounces (about 3 cups) whole wheat flour
  • 30 grams (about 1/4 cup) nonfat dry milk3
  • 1 1/4 tsp salt
  • 2 tsp instant yeast4
  • Optional addins/toppings: sunflower seeds, walnuts, etc.

Grease well a standard loaf pan (I use a 9x5, but an 8.5x4.5 is fine too) as this bread sticks.

Combine all of the ingredients in a large mixing bowl. Beat on medium speed for 3 - 4 minutes -- it will look like a batter, not a dough.

Scrape the mixture into the prepared loaf pan and cover with a tea towel or plastic wrap. Let it rise for an hour -- but don't expect it to rise to the top of the pan5 or dome.

Preheat the oven to 350F during the last 20 minutes of rising. Uncover the pan and bake for 45 minutes, tenting with foil after 25 minutes to prevent overbrowning if necessary. Remove and allow to rest in the pan for 5 minutes before turning out onto a cooling rack.

Notes:

  1. We happen to have pineapple-orange in the fridge this week, so I used that. I'm curious to see what would happen with lime or lemon, since I always have that on hand. You can just use water if you don't have any juice on hand too.
  2. The original calls for molasses. If you have that, try it. I plan to use honey on the next loaf.
  3. Dry milk reconstitutes at a 1:4 ratio. To use regular liquid milk, warm 1 cup of milk and omit 1 cup of water along with the dry milk.
  4. Instant yeast, how I love thee. Works better, faster and more consistently than active dry and needs no proofing. Just add it to the flour. If you are using active dry, increase the yeast to 2 1/2 tsp or one packet and proof in the warm water for 5 minutes.
  5. My second loaf did manage it in an hour. It promptly collapsed in the oven, making a nice V-shape. For various values of nice. If it rises 2/3rds of the way, it's ready to go in the oven.

Roasted Carrot and Avocado Salad with Citrus Dressing

Roasted Carrot and Avocado Salad

I made a mistake when we were out shopping last. You see, the store had carrots on a fantastic sale - about 3 lbs for a dollar - so I bought a big bag full. Problem: I bought 7 pounds of carrots.

Luckily, carrots don't spoil quickly but they have been making their way into just about everything. (And we still have 3 1/2 pounds left!)

This is one of those meals. It used up some carrot, some avocado and a little bit of everything else. It was a bit fussy as originally written, but I believe I've toned it down a bit to a nice, workaday meal that entices and satisfies. We had it as a "side" for some chicken scampi and millet, but you could up the greens and throw in a hard-boiled egg or two to make this a veggie-friendly main.

Roasted Carrot and Avocado Salad [printable recipe]

Adapted from 2009 Food & Wine Annual Cookbook, Recipe by Jamie Oliver
Serves 2 as a main part of a meal, 4 to 6 as a side

Carrots

  • 1 pound medium carrots, scrubbed, peeled and chopped into coins
  • 2 tsp cumin
  • 1 chile de arbol OR 1/4 tsp crushed red chile flakes
  • 2 large cloves of garlic, crushed
  • 1/2 tsp thyme
  • 1 tbsp red wine vinegar
  • 1 tbsp olive oil
  • salt, pepper
  • 1 tsp each orange zest and lemon zest

Dressing

  • 1 orange
  • 1 lemon
  • 2 tbsp red wine vinegar
  • 3 tbsp olive oil
  • salt, pepper

Salad

  • 2 1/2" thick slices of ciabatta bread OR 2 english muffins OR your favorite stale bread
  • 2 medium avocados, halved, pitted and cut into small chunks
  • at least 4 cups of greens of your choice, to your taste1
  • 2 tbsp sunflower seeds
  • 1 tbsp sesame seeds
  • 1 tbsp poppy seeds

Preparing the carrots

Preheat the oven to 375F. In a lidded pot or skillet, simmer the carrots in salted water for 8 minutes or until crisp-tender. Drain and transfer to a sheet pan or roasting pan large enough to allow the carrots to rest in a single layer.

Combine the cumin, chile or chile flakes, salt, pepper, olive oil, red wine vinegar, crushed garlic and zest. Pour over the carrots and toss to coat.

Roast the carrots for 25 minutes until they're tender.

Preparing the dressing

Juice the orange and lemon together to acquire about 1/3 cup (or slightly more) of juice. Combine with salt, pepper, red wine vinegar and oil, whisking or shaking well to combine (if using a dressing bottle).

Preparing the salad

Toast the sesame seeds, sunflower seeds and poppy seeds in a dry cast-iron skillet over low heat until fragrant. Toast the bread and tear/cut it into bite-size chunks.

In a salad bowl, combine salad greens, avocados, bread, roasted carrots (with their dressing), and the seed mix. Toss to combine well and serve with dressing.

Notes:

  1. We used green cabbage that had been lightly crushed. Great choices for this salad would be anything peppery and tangy - spinach with arugula, spring mix, mesclun, etc.

Chicken Satay with Spicy Thai Peanut Sauce

Chicken Satay

Earlier this week, I talked about making your own coconut milk from scratch. Here's what we did with ours: chicken satay marinated in coconut milk and a spicy sauce over coconut rice. Definitely a keeper!

The coconut rice uses some of the leftover coconut bits from squeezing out the milk, they add a subtle coconut flavor on their own but are best with a bit of coconut milk also replacing some of the cooking water. As for a side dish, we made some tangy pickled cucumber slices (recipe still needs some work, it was good but not right yet).

Also, it's really nice to grill again, even if somehow the temperature dial on ours got reversed (we were grilling on low when we thought it was on high....very, very slowly). Spring is here!

Chicken Satay [printable recipe]

Adapted from Quick and Easy Thai
Serves 4

Marinade

  • 1/2 cup unsweetened coconut milk
  • 1 tsp fish sauce
  • 1 tsp brown sugar
  • 1 tsp curry powder
  • 1 pound boneless, skinless chicken breasts

Combine marinade ingredients together in a dish or bag big enough to hold the chicken. Slice the chicken into long strips or 1" cubes. Place the chicken in the marinade and cover. Marinate for at least 30 minutes or overnight.

Soak bamboo skewers for at least 30 minutes. Thread chicken onto the skewers. Grill or broil for 6 minutes or until cooked through, turning at least once.

Serve with Spicy Thai Peanut Sauce (recipe follows) over coconut rice.

Spicy Thai Peanut Sauce [printable recipe]

Adapted from Quick and Easy Thai
Serves 4

  • 3/4 cup coconut milk
  • 1 tbsp red curry paste
  • 1 tsp chili-garlic paste
  • 1/2 cup chicken broth or vegetable broth
  • 1 tbsp fish sauce
  • 1 tbsp brown sugar
  • 1/4 cup smooth peanut butter
  • 1 tbsp lime juice

In a small pot, bring coconut milk to a simmer over moderate-high heat. Add chili paste and curry paste, cook for 4 minutes. Stir in remaining ingredients and cook for another 1 - 2 minutes, stirring to bring it together into a smooth sauce. Pour into a heatproof bowl and set aside to cool.

This sauce is best warm but it needs time for the flavors to blend. Try to make this at least 30 - 60 minutes ahead and reheat it a little just before serving if necessary. It was fantastic the next day.

Edited later: I must have been tired when I posted this, this recipe has been corrected slightly. I would also recommend trying palm sugar if you have it available instead of brown sugar for a more authentic flavor.

From Scratch: Coconut Milk

I'm approaching the end of my bachelor's degree; I'm down to just three classes and my senior project. Because of this, posts may not be as frequent as usual through June as I devote my time to finishing my degree. I can't believe I'm almost done!

We recently discovered Rancho Markets when they opened a new location in Magna and they've quickly become our go-to place for fresh produce. The prices are fantastic, particularly on sale days, and we can get all sorts of produce for about $15. This is about half the average price for the same items at stores like Winco and Walmart and frankly, the quality is better. Like the gorgeous red apples we bought at 25c per pound -- they were not only beautifully ripe and unwaxed but also organic!

(I should add that we don't live in an area well-served by co-ops, CSAs or farmer's markets. Our local county market only runs for two months, so, unlike many foodies, we're heavily dependent on grocery stores for our produce, even in the growing season.)

Last week, Rancho had Thai coconuts for 89c each so we picked up two fine specimens. We love eating fresh coconut but this time, our goal was to make our own coconut milk and some great Thai food.

Boy, did we ever succeed. I'll post about the recipes we made later this week, but for today, let's just focus on how to make the base ingredient from scratch: coconut milk.

Yes, you can buy coconut milk in cans. Most of the year, this is the cheapest way to acquire good coconut milk. Personally, I prefer the Thai Kitchen brand because it has coconut cream (solidified coconut milk), no additives and good taste where many of the other brands can be watery and bland. However, when coconuts are available, why not make your own? The two Thai coconuts we bought resulted in about 16 ounces of coconut milk plus tasty coconut fluffies to add to pancakes and smoothies for less than the price of 1 can.

I select coconuts that are heavy for their size and have a distinct "sloshing" noise when shaken. I want a lot of liquid in my coconuts. The husk should be relatively clean with no soft spots. Don't worry if you're not up for making this when they go on sale - an unopened coconut can be stored in the pantry for up to 6 months depending on how ripe it is, according to Melissa's.

Preparing coconuts is fairly simple. Take a clean nail or scratch awl and a tap hammer. Tap a hole through two of the three eyes on the coconut and drain out the coconut water into a small bowl. Preheat the oven to 325F and bake the coconut on a baking rack for about 30 minutes.

Remove it from the oven and set it on a sturdy work surface. Let it cool a bit so you can touch it and then crack it open with a hammer. It shouldn't take too much effort. Using a paring knife (or an oyster knife, if you have one), remove the white flesh from the brown skin and cut it into chunks. It should be fairly easy to remove.

Now for the fun part: making coconut milk.

Process the chunks of coconut flesh in a food processor or blender until coarsely chopped. Add the reserved coconut water (don't go over the fill line in the food processor, for this, it may be easier to use a blender) and blend until pureed. If you don't have much coconut water, add boiling water to cover.

I might add here that fresh coconut water is incredibly good. Much, much better than the canned "coconut water" they're selling in stores now. If you chill the coconut in the fridge for a few days, you can have fresh ice-cold coconut water for a snack when you do this! (Of course, then you need to use boiling water to make the milk.)

Take a clean piece of cheesecloth or a flour sack towel and line a colander or sieve with it. Set the colander into a bowl and pour in the coconut puree. Gather up the edges and press the liquid out until you're left with fairly dry coconut shreds.

You've just made coconut milk! I needed two coconuts to produce about 16 ounces or so of coconut milk. It won't last long - only a couple of days in the fridge, so make sure you have meals planned to use up the milk that day or the next.

But what do you do with the coconut fluffies left? Most people say to throw them away - they don't have too much flavor left now that the milk has been extracted. However, we found that they were a great addition to pancakes, cereal, smoothies and breading for shrimp or karbonāde. (My husband especially likes to use it when he makes a Dutch Baby for breakfast.)

Later this week: What we did with our fresh coconut milk!

Pecan Pie

Bakerella's Mama's Pecan Pie

I've made a lot of pecan pies this year. My dad loves them so every couple of weeks I make another pie. I wasn't satisfied with making the same recipe over and over again because I wasn't satisfied with the way the recipes were turning out, so I've been trying a different recipe almost every time on him, looking for the right one.

My favorite is still the Maple Pecan Pie but it uses a lot of (expensive) maple syrup, so I've been looking for one that was almost as good. I've tried traditional Southern recipes with molasses (those were okay but not great), I've tried cooked and uncooked recipes. So far, most have been simply "okay". Some he liked better than I did, some I liked the raw filling more than he liked the cooked.

This one from Bakerella we can both agree on. It's easy and doesn't call for any expensive ingredients. (Actually, I probably made it more expensive because I don't like using margarine.) The original recipe made 3 pies! If I had 3 pie dishes, I'd consider it because he goes through pies so fast. And, most importantly, this one got the highest reviews after the maple pecan. I loved the filling and he loved the end result.

I normally refer you to Food Network for Alton's pie crust, but this time, I'm reprinting it below with how I make it. If you've never made pie crust before, I strongly recommend you watch the Good Eats episode "I Pie" for more information.

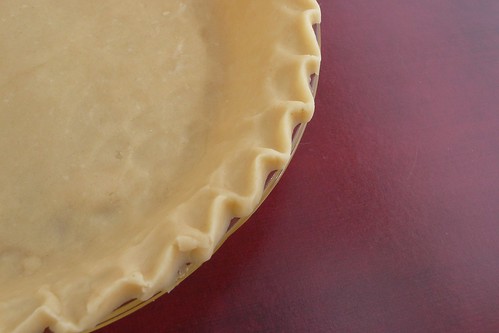
Pie Crust

Alton's Pie Crust [printable recipe]

Adapted from Alton Brown's Good Eats episode, I Pie
Makes 1 9" pie shell

  • 3 ounces (6 tablespoons) butter
  • 1 ounce (2 tablespoons) lard
  • 6 ounces (approximately 1 cup) all-purpose flour, plus extra for rolling dough
  • 1/2 teaspoon table salt
  • 1/4 cup cold water

Cut butter and lard into small pieces. Combine flour and salt in a food processor and pulse a couple of times. Sprinkle the butter pieces evenly over the flour's surface and pulse 5 or 6 times until the flour begins to look sandy. Sprinkle the lard pieces evenly over the surface and pulse another 5 or 6 times. The mixture should now begin to start to have texture. Sprinkle a little bit of water over - about a teaspoon's worth. Pulse another 4 times. Repeat sprinkling a teaspoon of water and pulsing 3 times until the dough begins to come together. It is ready when it holds together after being squeezed. (It will not look like bread dough and will be all crumbly.)

Scoop out the dough and squeeze into a rough disc 5" or so in diameter. Put it inside a gallon ziptop bag and refrigerate for 30 minutes.

Remove the dough from the fridge and cut open the 2 sides of the bag. Sprinkle a little bit of flour over both sides of the disc and recover. Roll out until the dough takes up all of the space inside the bag. Open the bag and place a pie pan upside down on top of the dough and flip over. (The dough will now be resting comfortably inside the dish.) Remove the plastic. Trim the edges and make a nice fluted edge or press the tines of a fork into it.

If using this for a pie that requires a blind-baked pie crust, dock the pie all over and fill most of the way with pie weights or dried beans. Bake at 425F for 10 minutes or until golden brown. Remove, let cool and continue with your recipe.

The pecan pie recipe below does not require blind baking.


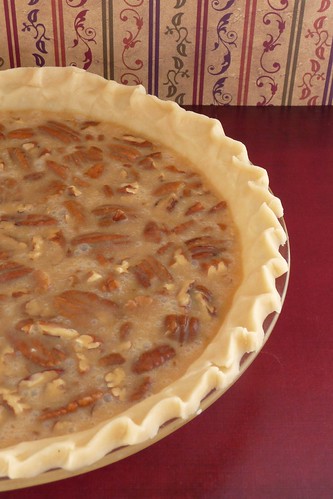
Pecan Pie Ready for Baking

Bakerella's Mama's Pecan Pie [printable recipe]

Adapted from Bakerella
Makes 1 9" pie

  • 5 1/2 ounces chopped pecans
  • 5 tbsp butter
  • 5 ounces brown sugar
  • 5 oz light corn syrup
  • 2 eggs
  • 1 tsp vanilla
  • 1 tsp all-purpose flour
  • 1/2 tsp salt
  • 1 dash baking powder
  • 1 recipe Alton's Pie Crust, uncooked

Melt butter in the microwave and set aside. If desired, toast pecans.

Preheat oven to 350°.

In a large bowl, stir together sugar, flour, salt and baking powder. Beat eggs together with vanilla, corn syrup and melted butter. Mix egg mixture into the sugar mixture and combine thoroughly. Fold in the pecans.

Pour the mixture carefully into the pie crust. Bake for 45 to 60 minutes or until the pies have swollen and then fallen.

Cool on a rack for an hour then chill.

Vietnamese Spring Rolls with Hoisin-Peanut Dipping Sauce

I wish I had pictures to show you but it was late and I was tired.

These spring rolls are awfully good all out of proportion to their size. Also, they will fill you up fast, so plan accordingly - no more than one or two per person for an appetizer. And don't skip the sauce - it really goes well with the rolls, though you could drizzle a bit on the filling instead.

When I made these, we opted for some steamed chicken to add to the rolls. Anything you add must be fully cooked as these rolls are served raw. Usually when we have these at a Thai restaurant, they add little boiled shrimp or steamed chicken, but you can add toasted chopped peanuts or tofu (probably fried for extra flavor) for protein if you're vegetarian or vegan. Both bean thread noodles and rice paper sheets are vegan and gluten-free friendly.

Since these are primarily veggie, feel free to pack in the veggies. I added quite a bit of each so my rolls were quite big and round. But, the good news is you don't need to worry about eating a lot of cabbage! It's a super-cheap way to fill up guilt-free.

If you don't feel like cutting thin strips by hand (I didn't!), use a mandoline or food processor to grate the veggies as coarsely as possible. Just be careful - they don't dip very well if the veggies are grated so you should really drizzle the sauce over the filling instead.

Vietnamese Spring Rolls [printable recipe]

Makes approximately 8 rolls

  • 1/4 head green cabbage, sliced thinly
  • 1 peeled cucumber, cut into long, thin strips
  • 1 oz bean thread noodles or rice vermicelli
  • 2 carrots, cut into long, thin strips
  • 22 cm round rice paper sheets
  • 1/4 cup mint, finely chopped
  • 1/4 cup cilantro, finely chopped
  • 1/4 cup basil, finely chopped
  • 4 oz cooked chicken (cut into strips), shrimp OR tofu, roasted, chopped peanuts, etc.
  • 1 recipe Hoisin-Peanut Dipping Sauce (recipe follows)

While you prepare vegetables, get a pot of water boiling. Add the bean thread noodles and cook for 5 - 6 minutes or until al dente. Drain, rinse with cold water and set aside.

Combine mint, cilantro and basil in a small bowl. Have the rest of the ingredients ready in separate bowls on your worksurface. Set out a large dish full of warm water for the rice paper sheets. Working with one sheet at a time and dry hands, take one sheet and soak it in the dish. After a minute or two, it will be very soft and flexible - much like plastic wrap. Remove it and carefully lay it out flat on your surface.

Along the lower third, mound your ingredients in a little log, leaving about 1" on the left, right and bottom for folding. Put a couple strips of chicken or tofu, a small amount of noodles, then add strips of cucumber, carrot and cabbage. Sprinkle over a healthy tablespoon of chopped herbs.

If you want, drizzle over a teaspoon or two of hoisin dipping sauce. Stretch the bottom of the wrapper up and over the veggies, then fold in the sides. Roll the log up towards the top and seal. These wrappers are very stretchy and will stick nicely/frustratingly to itself, so don't worry too much about tearing.

Cut in half with a bias cut and serve without delay with the (remaining) dipping sauce.

Hoisin-Peanut Dipping Sauce [printable recipe]

Adapted from Rasa Malaysia

  • 2 oz hoisin sauce
  • 1 tbsp smooth peanut butter
  • 1 tbsp rice vinegar
  • 2 cloves of garlic, crushed
  • 1 pinch crushed red pepper or chili paste

Mix all.

Happy Easter! Or, How to Naturally Dye Easter Eggs

Easter Eggs

Last year, my husband introduced me to naturally dyeing Easter eggs using onion skins, some of which can be seen in yesterday's photo post. I was rather curious as to how they would come out because I grew up dyeing eggs with the Paas kit like many Americans.

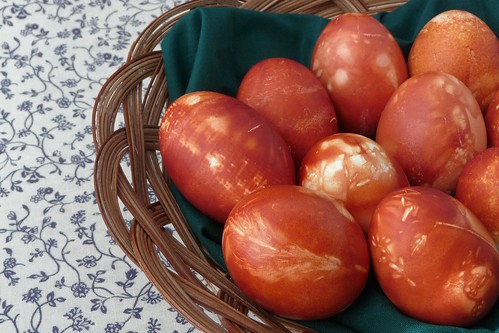
To my surprise, they came out beautifully: dark browns and reds, swirled and mottled where the skins had pressed or decorated with tiny imprints of leaves and flowers picked from our yard. I absolutely adored these elegant little eggs and quite honestly, breaking some of them almost broke my heart.

Dyeing eggs this way is more fun than using the little wire dippers and egg cups filled with Red Dye No. 45, or at least, that's what I think. It's simple to do but you do need a few pieces of basic equipment:

  • An old pot or stainless steel
  • Old pantyhose, knee-highs, cheesecloth or fabric you no longer want
  • Lots and lots of yellow and red onion skins - the dry papery ones
  • Pretty grasses, flowers, leaves, tape, string, etc.

Egg Design Ideas

You can get all sorts of colors by using different types of food items. The South Texas Unit of the Herb Society of America has a great page on dyeing naturally with suggestions on interesting items to use for colors, from red cabbage (which produces blue dye) to the more exotic brazilwood for pink or cochineal for fuschia. They also have recommendations for a cold dye process that makes it easier to do multiple color overlays.

Easter Eggs

Basic Preparation

Get out your old pot and fill it up halfway with cold water. Dump in enough onion skins to come up to the top or above and begin heating the water to a simmer. Press down on the onion skins so that they all get soaked - you should wind up with a pot full of water and onion skins. Keep adding skins and water as needed.

Once the water comes to a simmer, add prepared eggs and keep the water simmering for about 12 to 14 minutes. Remove the eggs to a bowl filled with ice water. Once cool, clean off the eggs and refrigerate or enjoy.

But... how to prepare the eggs? Depending on the look you want, try different things. I love marbled eggs and making patterns with different items.

Various Eggs

(Latvian "flag" egg, jumis symbol egg, grass seed egg, starburst and stripes egg, speckled egg and flowery egg (with a mini chicken design))

Most importantly... Be creative and have fun!

Here's how we prepared our eggs this year:

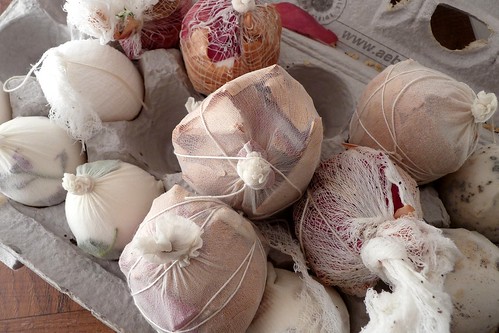
Eggs Prepared to Dye

Solid Eggs

For solid eggs, just add the eggs to the pot and simmer for 12 - 14 minutes.

For solid eggs with texture, wrap tightly in hose or cheesecloth to get a woven texture.

Marbled Eggs

Pack dry onion skins into a knee-high stocking or piece of pantyhose. Nestle the egg into the skins and pack tightly with skins before tying off the hose. Tie tightly around with string to press the onion skins into the egg.

The more you pack, the lighter the egg. For pretty patterns and dark color, only use a few skins. Marbling comes from many small pieces touching the eggs in different ways, so nestle accordingly.

Imprinted Eggs

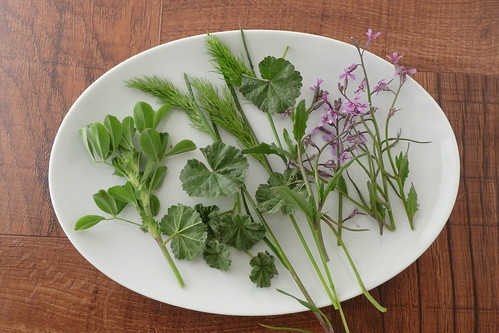
Dampen herbs, leaves, flowers, grasses or other solid flexible objects (stickers too or even wind string or rubber bands around the egg) so that they will stick to the egg. Carefully nestle the egg into a piece of pantyhose and tie very tightly shut.

Use bits of masking tape to draw lines on the egg. Anything covered by the tape won't dye, so this can be a great way to do several colors for a fantastic result. But, as you can see from our "flag" egg, you must make sure the tape is completely flat - any gaps and dye will seep in.

Speckled Eggs

Sprinkle damp eggs with used coffee grounds, raw bulgur or buckwheat groats, then nestle into a pantyhose and tie tightly. The more you use, the less dye you will have.

Easter Eggs

And finally...

A bit of vegetable oil rubbed on the dry, finished eggs will add a nice sheen to them, making them all ready for Easter morning.