Easter

Naturally Dyed Easter Eggs

Today we're busy dyeing Easter eggs with the onion skins we've collected all year and small flowers from our yard that survived the snow this week. They may not be the bright jewel-tones of the Paas eggs I grew up with, instead they're lovely and elegant.

Steamed Siu Mai Dumplings

Steamed Siu Mai Dumplings

One of the things on my "bucket list" of things to do in my life is to go to a dim sum restaurant and have all sorts of different dim sum courses. I love small plate meals (and if I ever get to Spain, I'm definitely trying tapas) and one of my comfort meals is to whip out some pre-made gyoza (potstickers) to reheat for a snack.

Unfortunately, making potstickers and other dumplings can be very time-consuming and is best done with friends or family. I usually wind up deciding to make a whole meal of dim sum, which means making at least three different types for dinner -- and invariably, I forget just how time-consuming it is and dinner is late by hours. So I heartily recommend doing this in the afternoon and covering the finished dumplings with a damp paper towel until it's time to cook dinner.

I've been having some cravings for dim sum lately and came across a recipe for siu mai in the April issue of Cooking Light that looked inspirational. I wanted to try the cabbage/apple mixture, since I'm a fan of that in salad form and was pleasantly surprised to find that it was a great mix. You can't really taste the apple, it only gives some pleasant texture and rounds out the flavors nicely.

These are easily converted for vegetarians and vegans, simply use tofu or edamame for the protein. I opted for chicken because I already had some cooked chicken on hand, but any kind of flavorful protein works well here.

I also thought I would do something different for this post: Because the pleating is difficult to describe if you've never done it before or eaten one of these as part of a dim sum course or meal, I recorded how I construct them. I'm not that great - largely because I don't make these very often and also I get nervous being in front of the camera, but it should give you an idea of how to go about it.

Steamed Siu Mai Dumplings [printable recipe]

Adapted from Cooking Light
Makes about 2 dozen or so

  • 2 tbsp fresh cilantro
  • 2 green onions, roughly chopped
  • 3 cloves of garlic, roughly chopped
  • 1/2 tsp ginger
  • about 2 cups sliced green or napa (chinese) cabbage
  • 1/2 apple, peeled and chopped (preferably a tart variety such as Granny Smith)
  • 2 tbsp soy sauce
  • 1 tbsp oyster sauce
  • 1/4 tsp crushed red chile pepper flakes
  • 3 ounces minced cooked chicken or other protein
  • 24+ round gyoza wrappers

Combine cilantro, green onions and garlic in a food processor, chop finely. Add cabbage and apple, process until finely chopped. Remove to a bowl, mix in ginger, soy sauce, oyster sauce and chile flakes, then stir in chicken or protein.

Set aside a small bowl full of water at your workspace. Lay out a gyoza wrapper, leaving the rest under a damp paper towel so they don't dry out. Place about 1 tablespoon's worth in the center and dampen the outside edge of the wrapper. Gather the edge up and pleat, squeezing the pleats together so that the wrapper stands up around the filling. Add more filling so that the little "pouch" is full (cabbage cooks down quite a bit, so you want it to rise a little above).

Place the siu mai in a bamboo steamer that has been lined with a steamer liner or cabbage leaves2. Steam for 9 - 10 minutes.

Notes:

  1. You can also use parchment, but cutting some holes is probably a good idea.

Creamy Egg & Lemon Soup with Meatballs

I wanted to share this with you yesterday, but when I woke up in the morning, I was queasy.

Now, sometimes that just happens when I wake up (though usually from a nap), so I puttered around, getting ready for the day and all, while trying not to think too much about my stomach. Breakfast was prosas biezputra (millet porridge) with a mushroom omelet and my now-usual iced coffee. (I love my husband's omelets. He's the only one who can cook an omelet that I will not only willingly eat but actively look forward to.)

Writing about food when you're feeling queasy is not fun. In fact, it only stopped once my husband gave me one of his antacids to try, since I was snacking a lot more than my usual half apple. Lo and behold, the nausea stopped. I was able to cook dinner and finally, I felt well enough to sit down and begin writing this post.

In honor of feeling generally bad all day and wishing for a good soup I didn't have to cook or fight with the microwave to defrost, I'll share with you a recipe I made last week. It's a take on a classic Greek avgolemono soup with tiny, fluffy meatballs that soak up the deliciousness and explode on your tongue like concentrated stars.

The original called for lamb and I agree - ground lamb here would be divine. But it's expensive and hard to get in my town unless I get lucky with the sales, so I used some leftover ground pork which turned out to be delicious. Often avgolemono soups are not very good reheated the next day but this one was pretty good albeit without the wonderful mouthfeel of the original.

Creamy Egg & Lemon Soup with Meatballs [printable recipe]

Adapted from Sunset Serves 4 to 6

Meatballs:

  • 1 egg, beaten
  • 1/2 cup panko or breadcrumbs
  • 1/4 cup milk
  • 2 large cloves of garlic, crushed
  • zest of 1 whole small lemon
  • 1 tbsp fresh parsley, minced or 1 tsp dried
  • 2 tbsp fresh mint, minced or 1 1/2 tsp dried
  • 1/2 tsp salt
  • freshly ground black pepper
  • 1/2 lb ground pork or lamb
  • oil for frying

Soup:

  • 3 cups chicken broth
  • 4 cups vegetable broth (I recommend using 4 tsp of Vegetable Bouillon)
  • 1/2 cup arborio, sushi or other short-grain rice
  • 3 eggs, beaten
  • large strips of zest from 1 lemon - use a peeler or knife
  • juice of 2 small lemons (about 1 1/2 ounces)

Making the Meatballs Combine 1 beaten egg, milk, panko, garlic, lemon zest, mint, parsley, salt and pepper in a medium bowl and let it rest for a few minutes so that the panko can begin to soak up the milk. Add the ground meat by crumbling it in your hands into the bowl, then mix everything together thoroughly.

Form tiny meatballs - about 1/2" to 3/4" in diameter or 10 g each by weight - and set aside. In a large, preferably cast-iron skillet, heat about a tablespoon of oil over moderate heat. Fry the meatballs in batches, being careful not to overcrowd, until golden brown and remove to a dish.

Making the Soup In a medium pot, bring both broths and strips of zest to a simmer. Add the rice and cover partially, simmering for about 20 minutes until the rice is al dente. Remove the zest ribbons and discard. Add the meatballs and return to a simmer then remove from the heat.

Whisk the three eggs together well in a large bowl then whisk in the lemon juice. Slowly pour in about 1/2 cup of the soup, whisking constantly.1 Repeat four times. Pour the egg-broth mixture into the soup and serve immediately.2

I recommend serving this soup with a small salad and a slice of crusty bread to sop up the last drops.

Notes:

  1. This is called tempering the eggs. If you add the eggs into the hot soup, they will curdle. By adding hot liquid slowly into the eggs while whisking, we can control the temperature and prevent the eggs from getting too hot too fast. It seems kind of finicky but it's necessary and will result in a deliciously creamy soup.
  2. If it isn't hot enough for you, you can gently rewarm it over low heat but DO NOT allow it to simmer or boil. The eggs will curdle and all that hard work you did tempering will be for naught.

Vegetable Bouillon

Vegetable Bouillon

I've made a mean veggie stock in the past but the problem with it is that we use it up so fast, I'd have to make stock every Sunday just to keep up.

I started looking for a commercial bouillon every time we went to any kind of grocery store. Usually, all I found was a box of veggie stock (granted, I love Pacific Organic's stock) accompanied by all sorts of meat-based bouillons. Not a single veggie bouillon in sight, even in the frou-frou stores.

Then, in January, Heidi at 101 Cookbooks posted an incredibly simple raw bouillon recipe. It took me a while to get to making it, but finally did this month.

Boy, I wish I hadn't waited.

It's a great, simple and very flexible bouillon. It tastes wonderful. We used it last night in this creamy egg-lemon soup along with some chicken broth and I swear, it smelled just like the best chicken noodle soup you've ever tasted.

Please check out Heidi's post for her way of making this. One of the changes I made was because my husband seriously detests anise (and it's expensive here). The only thing we'd change about the batch we have in the freezer is to use roasted garlic instead of raw for the extra oomph of flavor. I've written that in as an option because going through 3 1/2 cups of concentrated bouillon is going to take us a while.

One word of warning: Yes, this calls for a lot of salt. Bouillon is preserved with salt and it will not be salty once it is reconstituted. The amount of salt has a secondary benefit - you can leave the jar in the freezer and it will still be scoopable.

Vegetable Bouillon [printable recipe]

Adapted from 101Cookbooks
Original recipe featured in The River Cottage Preserves Handbook
Makes approximately 3 1/2 cups

  • 150 g | 1 regular leek, white and light green parts
  • 200 g | 3 medium carrots, peeled
  • 200 g | 1/3 stalk celery
  • 30 g | about 6 sun-dried tomatoes
  • 100 g | 1 large shallot, peeled
  • 25 g | 3 - 4 large cloves of garlic -- roasted or raw
  • 250 g | 7 ounces fine sea salt
  • 40 g | about 1 bunch parsley, flat-leaf or curly

Chop everything roughly and combine all but the salt and parsley in the bowl of a food processor. You may need to pulse several times between ingredients to make enough room, depending on your model3. Process to a coarse puree then add the parsley and salt. Puree until mostly smooth.

Remove to freezer-safe containers. Store only what you need in the fridge, the rest in the freezer. The bouillon will still be easily usable straight out of the freezer due to the high salt content.

Usage: 1 teaspoon of bouillon per cup of water.

Notes:

  1. You can change this recipe up to suit your tastes or what's in season. I'm looking forward to checking out this book when it arrives in the US to see what other combinations they recommend.
  2. I wanted to use cilantro too but I had run out the day before.
  3. I have a 7-cup and had to remove part of it at one point to make sure it pureed evenly. An 11-cup, on the other hand, would just chow through this in no time.

Spicy Pepperoni Sausage

Spicy Pepperoni Sausage

One of the things I found I missed when I was in Latvia was pepperoni. (Despite the wonderful aisles of cured meats in the stores, pepperoni isn't really well-known. Spicy salami, yes, pepperoni, no.)

I'm a die-hard pepperoni fan -- my favorite pizzas are topped with loads and loads of pepperoni. But as I become more conscious of what I'm eating, I find that some of the foods I enjoy are rather scary when you look at the ingredient list. Pepperoni is one of those and frankly, the pouch stuff isn't that great.

I didn't really know what to do about it though. Making it hadn't really occurred to me. One day my husband looked at some bag of pepperoni in the store and showed me the mile-long ingredient list full of stuff I could barely pronounce, then asked me why it was we hadn't made it yet. I shrugged and said I'd look for a recipe when we got home.

Now, I'll be the first to tell you that this is NOT an authentic pepperoni sausage. Real pepperoni is raw, not cooked; it's fermented, cured and dried over the course of weeks. I do not have the facilities to do this nor the desire. I just want something that's easy, spicy and tastes reasonably like pepperoni.

This is that pepperoni.

As to why I used a mix of meats... Traditionally, pepperoni is cured pork. Kosher (halal) pepperoni is cured beef. I had a bit of each. I would wager that since Hormel sells turkey pepperoni that you could do it with turkey or even chicken, but I don't know what the oven timing would be.

If preserving the color is necessary for you, invest in some Morton Tender Quick Curing Salt, which is a mix of sugar, salt, potassium nitrite and potassium nitrate. I've found it at exactly one store in Salt Lake - Southeast Asian Market - where it was quite pricey for a 2 lb bag that I felt I'd probably never use up. Instead, I figured that since I would be freezing the leftovers and don't care about color preservation that leaving out the preservatives would not be a big deal.

This is definitely a make-ahead recipe but very, very easy. Active time is probably 10 minutes, for all that the recipe takes three to four days to complete. It comes out very dense, very spicy and a very reasonable facsimile of pepperoni. It's close enough for me, at any rate.

Spicy Pepperoni Sausage

Spicy Pepperoni Sausage [printable recipe]

Adapted from Tammy's Recipes

  • 1 lb ground beef or pork (or a mix of the two)
  • 1 tsp liquid smoke
  • 1 tsp ground black pepper
  • 1 tsp mustard seed, lightly crushed
  • 1 tsp fennel seed, lightly crushed
  • 1 tsp crushed red pepper
  • 1/2 tsp garlic powder
  • 1/2 tsp smoked paprika1
  • dash of Hungarian hot paprika2
  • 1/4 tsp sugar3
  • 1 1/2 tsp salt

I recommend starting this recipe on a Thursday and cooking on Saturday or Sunday.

Mix all ingredients together thoroughly, making sure to knead the spices evenly throughout. Wrap in plastic wrap and let it rest in the fridge for two or three days4.

On baking day, remove the meat from the plastic and form into a nice 2" thick log. Place it on a rack set into a rimmed cookie sheet and then into the oven5. Turn the oven to 200°. Turn the meat every two hours and cook for about 7 to 8 hours until it is dry and firm.

Remove from the oven and pat off the excess grease and fat on the surface. Let it cool then slice thinly. Store in the fridge or freezer.

Notes:

  1. Or regular, if you don't have smoked.
  2. Omit for less spice or substitute cayenne pepper.
  3. This is to replace the curing salt and balance the spiciness.
  4. Don't try this with meat that says "Use or Freeze by Yesterday" - do this with meat that can stand to be in the fridge a few days without spoiling which is anything fresh or frozen while fresh. 4a. And if you're doing this from frozen ground meat, do your hands a favor and let it thaw completely.
  5. We want lots of airflow since the idea of this is to dry it out - letting it sit in its own fat is not helpful in achieving this goal.

Garlic Gnocchi with Lemon, Thyme and Leek

Garlic Gnocchi with Lemon, Leek and Thyme

I mentioned last week that we'd picked up a big bag of potatoes and were looking for ways to use them up. We had gone to my mother's for dinner and she made gnocchi for us which made me remember how much I love gnocchi. I'd just wished she'd made about double!

I've bought the imported, vacuum-packed gnocchi from Italy before and loved it but living frugally means that spending several dollars on a pound of pasta isn't always the best use of our money. Especially when regular pasta can be had for less than a dollar a pound bulk.

But that's okay. Living frugally doesn't have to mean living badly. I think we eat better on our restricted grocery budget than we ate when we had money coming in regularly. We eat more veggies, make more from scratch and avoid more chemicals than we did when we could buy whatever we wanted at the store.

Was it worth it? Let's break it down. Since spices are difficult to calculate and extremely light, I'm going to go with a flat rate for all three:

  • Potatoes at 10c per pound = 13c
  • Flour at 55c per pound = 9c
  • Spices = 10 c

Total: 32 cents.

That's it! And it makes enough gnocchi for two meals for two. Omitting spices brings it down to less than a quarter.

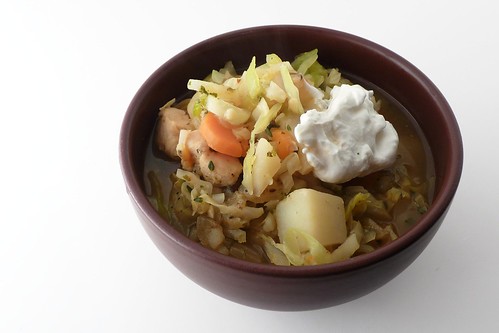
Of course, making it into a full meal, as below, adds more expense, but not that much. I'll spare you the details, but based on my quick back-of-the-napkin calculations, dinner cost about $5.75 for two. The local restaurant that serves gnocchi in my town charges about $13 per plate! Plus, I don't know what's in it or how many chemicals, fats, preservatives and other nasties are hiding within.

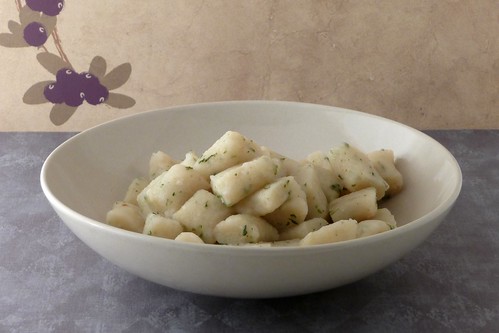
Anyway, gnocchi are pretty easy to make, tasty and filling. Using a ricer or a grinder results in a fluffy, light texture and they cook in less than two minutes. We both loved it and based the sauce off of my favorite way to cook pasta, though I omitted the goat cheese sauce in favor of shaved Parmesan and lemon juice. It's also easy to convert for vegans. I hope you give it a try!

Garlic Gnocchi

Garlic Gnocchi [printable recipe]

Adapted from Cooking Light
Serves 4 to 6

  • 20 oz baking potatoes, scrubbed
  • 2.5 oz flour
  • 1 tsp salt
  • 1 tbsp dried parsley
  • 1 tsp minced, dried garlic

Scrub potatoes well and pierce several times with a fork. Place in the oven directly on the rack and heat oven to 425°. Bake potatoes for about an hour. Remove and cut in half, allowing to cool until you can handle them. Scoop out the flesh and set the skins aside1.

If you have a ricer2, force potatoes through into a large bowl.

If you have a meat grinder, fit it with a coarse disc and grind the potatoes into a large bowl.

If you don't have either, mash them puppies. It'll be fine, just not as light or fluffy.

Stir flour, garlic, parsley and salt into the potatoes and begin making a rough dough. Turn out onto a floured surface and knead it into a smooth dough. Form it into a ball and cut into quarters. Roll each quarter into a long rope about 20 - 24"3 long. Cut the rope into little pieces about three-quarters of an inch long4.

If you want to be fancy and authentic, press each piece against the tines of a fork. You will have stripes on one side and an indentation from your thumb on the other. I didn't bother.

Lay out the gnocchi onto a lined sheet pan. This recipe makes enough for four to six, so you might want to freeze some for later.

To cook, drop into boiling water and remove when they float - about 90 seconds. Frozen gnocchi will take a minute longer.

Notes:

  1. Can you believe the original said to discard the skins?! No way! Either eat them up right there, like my husband and I did, or turn them into potato skins by sprinkling some cheese and cooked bacon over then broiling briefly.
  2. I don't have a ricer. I had the opportunity to get one for a reasonable price in Liepāja but I didn't. Luckily, there's another way without adding a monotasker to the kitchen.
  3. About 50 - 60 cm.
  4. About 2 cm.

Garlic Gnocchi with Lemon, Leek and Thyme

Garlic Gnocchi with Lemon, Leek and Thyme [printable recipe]

Adapted from Cooking Light
Serves 2

  • 1/2 recipe Garlic Gnocchi
  • 2 leeks, white and light green parts only, sliced
  • 3/4 cup (about 120 g) shallots, minced
  • 4 cloves garlic, crushed
  • 1/2 cup walnuts, chopped
  • 1/3 cup sun-dried tomatoes, sliced
  • 1/4 cup fresh parsley, finely chopped
  • 2 tbsp (about 1 ounce) fresh Parmesan, shaved
  • 1 tbsp fresh thyme, finely chopped
  • 1 tbsp butter
  • 1 tbsp olive oil
  • 1 tbsp lemon juice
  • salt and pepper

Over moderate heat, heat butter and olive oil. Once the butter begins to foam, add the shallots and garlic. Saute for 2 to 3 minutes, then add the herbs and spices, followed by the leeks. Continue to cook, stirring frequently, until leek is tender and soft. Stir in walnuts, sun-dried tomatoes and lemon juice and remove from heat. Serve over gnocchi and sprinkle with Parmesan shavings.

Baked Potato Soup

Baked Potato Soup

It doesn't look like much, does it? However, it's like having a loaded baked potato in a soup and quite satisfying. We had about 15 pounds of potatoes to use up because it was such a fantastic sale so for the past two weeks, I've been using potatoes instead of rice at meals!

I've also been reading a bunch of heritage or classic cookbooks (or "cookery books" as they refer to themselves) and was amused to see one that gave prices in 1878. The author was making the case that buying in bulk was cheaper and better than buying piecemeal at the local shop, so she discussed prices and stated that 1/2 barrel of potatoes was $1.50 in 1878 dollars.

The equivalent today? A 1/2 barrel is 75 lb' worth of potatoes. A $1.50, adjusted for inflation to 2009 dollars, becomes $32.95 or about $0.44 cents per pound.

I bought 15 pounds of potatoes on sale at my local megamart for $1.58 -- just 10 cents a pound! Modern agriculture and subsidies are very apparent.

Her original point still stands: buying in bulk as close to the source as you can manage will save you money. I could buy 50 lb of red potatoes off the back of local farmer's pickup truck for considerably cheaper than I could ever buy in the megamart.

But however you get your spuds, this is a good soup to consider if you have a few extra laying around. Spring's here and soon it'll be too hot to have these kinds of soups, so make it before the weather warms up too much!

Baked Potato Soup [printable recipe]

Serves 4

  • 3 shallots, unpeeled
  • 1 head garlic, separated but unpeeled
  • 120 g bacon ends, chopped (about 1/4 lb)
  • 3 - 4 green onions, sliced
  • 2 - 3 potatoes, diced (about 1 lb or 450 g)
  • 1 cup shredded cheese (about 4 ounces)
  • 1 medium-large onion, diced (about 3/4 lb or 340 g)
  • 1/2 cup sour cream
  • 3 cups chicken or vegetable stock (about 750 ml)
  • 1 tbsp fresh thyme or 1 tsp dried (or about 3 - 4 sprigs)
  • 1 tsp Worcestershire sauce or soy sauce
  • 1 cup light beer1 or white wine

Dry-roast the shallots in a cast-iron skillet (without oil!) over moderate-low heat for 10 minutes, then add the garlic. Shake the pan regularly and roast until they're soft, about 10 to 15 minutes. Some black and brown spots are okay. Peel and/or squeeze the garlic and shallots out of their skins, mash and set aside.

Dice the onion and bacon ends, then fry over medium-low heat in a large pot for about 15 minutes until the bacon is mostly cooked and the onion is soft and turning brown. Add thyme, salt, pepper, Worcestershire or soy, shallots and garlic to the pan. Cook for 30 seconds then add the beer or wine. Add the potatoes and pour in the stock.

Bring to a boil then reduce to a simmer and cook until the potatoes are tender, about 20 minutes or so. Using an immersion blender2, puree to a chunky puree. Stir in green onions, sour cream and cheese.

Notes:

  1. We used Corona, but many beers would be good here.
  2. Or a blender or a food processor. Just be careful not to overload it.

Five Minute Chocolate Cake

5 Minute Chocolate Cake

Sometimes you want a bit of chocolate cake and don't want to take the time or the calories to make a full 9" double- or triple-layer cake. I tend to be very prone to having fits of chocolate cravings so the other evening, I decided I really needed a chocolate fix. Nor did I feel like waiting the three hours for a cake at 10pm at night. I didn't even want to wait the 45 minutes it would take for me to whip up a batch of Double Chocolate Muffins.

As I've alluded here in the past, I'm not eager to bake a whole cake for one craving when I'm trying to reset my eating and lose some weight. I wind up eating at least half the thing over the following couple of days (wouldn't want it to get stale!) and feeling guilty. I didn't feel like having a generous helping of guilt along with my cake.

I remembered seeing someone on my RSS feeds link to this mug cake recipe. I've tried those mug cakes before and honestly, it didn't really work out. (Don't trust those 5-ingredient recipe thingies for mug cakes. They just don't taste like cake.) This one, on the other hand, looked like it was right about what I had in mind.

Unfortunately, the original two-mug recipe isn't the most "light" creation, clocking in around 500 calories in each mug once a bit of ice cream is added in, but it's less than the average slice of cake and far less than the average half a cake. However, I found that the first time I made it, it was really too much at once for me, so I like to subdivide the recipe into four mugs, saving a couple for later. (I found this is easiest to do if you mix the batter up in a bowl and pour equal portions into each mug.) I also plan to rework it a little to see if I can reduce the calories.

It turned out really well. (You're not surprised, I can tell. I don't post recipes I don't like as I would feel bad leading you down some rotten path and this blog is my personal cookbook.) It came out moist, not too dense thanks to the cake flour and baking powder, chocolate-y and just right with a bit of ice cream. It was definitely just right to satisfy my cravings for a while. Also, a tall glass of milk is really, really good with this, as is a bit of fresh strawberry sauce.

This recipe makes two big mugs' worth or four normal mugs' worth of chocolate cake, so you need to split the ingredients equally between the mugs. The hardest part is splitting the egg; here are a few methods for measuring besides pouring and hoping. Use your kitchen scale and weigh the beaten egg, then replace it with the mug on the scale and pour in half by weight. Or, mix all of the ingredients together in a bowl and then pour equal amounts into each mug. This is the method I find the easiest, even if it dirties up an extra bowl. Alternatively, you may find it easier to use a product such as Eggbeaters which allows for measuring out a portion of an egg.

Five Minute Chocolate Cake [printable recipe]

Adapted from Not Quite Nigella
Makes 2 to 4 servings

  • 4 tablespoons | 30 g cake flour
  • 4 tablespoons | 55 g vanilla sugar1
  • 2 tablespoons | 15 g unsweetened cocoa
  • 1 teaspoon | 5 g baking powder
  • 1/4 tsp | 2 g salt
  • 1 egg (2 oz or 55 g)
  • 3 tablespoons | 55 g milk
  • 3 tablespoons | 35 g oil
  • 3 tablespoons | 40 g dark chocolate chips
  • 2 to 4 microwave safe coffee mugs2

Whisk together half of the dry ingredients, excepting the chocolate chips, in each mug. Add the wet ingredients and whisk well to combine. Sprinkle chips lightly over the top of the batter and cover the mugs with plastic wrap.

Microwave each mug separately on 50% power. I followed Not Quite Nigella's recommendation and used my microwave's "Melt Chocolate" function3, which took about 90 seconds for a large mug and 60 seconds for a small mug. Check after 60 seconds - the cake should puff up nicely. When it looks like a nice, moist cake, stop. It will cook a bit further due to carryover.

Serve with ice cream4 and milk.

Notes:

  1. If you don't have vanilla sugar, add 1/2 tsp vanilla extract.
  2. I first tried this with big 16 oz "mugs" that I use for French Onion Soup. Latte mugs (those big, wide mugs you get cafe au lait in at posh coffeebars) would be very nice here as well. If you use standard 10 oz coffee mugs, be careful when splitting between two as it will quite likely boil over.
  3. My microwave is 1100W. If you don't have a Melt function (most microwaves don't), then set the Power Level to 50%.
  4. For extra decadence, top with hot fudge or chocolate syrup.

Ukrainian Kapusniak (Fresh Cabbage Soup)

Ukrainian Kapusniak (Fresh Cabbage Soup)

It's mid-March and though we've had pretty nice Spring weather lately, we still get the occasional storm that snows us under for a few days. This past weekend was one of those storms and we had about 8" of snow in a day. Of course, we'd just put away the heavy leather jackets we wear in the winter, the snow shovel and salt! Isn't that always the way?

Naturally, it was a night to have soup. We had acquired a bunch of green cabbage on sale at the local grocery but it needed to be used fairly quickly so it didn't go bad. I wanted something easy to make, filling and satisfying, then remembered this recipe I'd found when researching a question for someone. It was perfect for a cold, snowy night.

My recipe below was adapted from one of the Ukrainian recipes on Wikibooks but honestly could be said to be from any of the countries in Eastern Europe. Cabbage soups are quite common there and I've had variations on this theme in both Poland and Latvia. Often, this soup incorporates sauerkraut, as fresh cabbage is obviously not available year-round.

One area where I deviated was in my use of spices. Traditionally, as with many dishes from Eastern Europe, dill is the spice of choice. However, for all that my husband is Latvian, he really does not like dill that much (I believe a few meals that were overwhelmed with dill rather put him off of this herb unless carefully used and balanced). I had come across a bunch of fresh thyme at a market last week and, unable to resist, snatched up a bunch and cackled wildly (ahem, perhaps not too loudly). Letting fresh thyme, particularly thyme that looked as if it had just been snipped from a local greenhouse, go to waste would be a cardinal sin. The fact that I love fresh thyme might also factor in!

Ukrainian Kapusniak (Fresh Cabbage Soup)

I've found that I really love cabbage soups. The cabbage becomes so tender and tasty! If possible, use Spanish smoked paprika rather than regular. The smokiness really adds to the soup's flavor.

Ukrainian Kapusniak [printable recipe]

Adapted from a recipe on Wikibooks
Serves 4+

  • 1 liter | 1 quart chicken stock
  • 500 g | about 1 medium head green cabbage, cored and sliced
  • 360 g | about 2 medium potatoes, peeled and chopped
  • 230 g | about 4 medium carrots, peeled and sliced
  • 230 g | about 1 medium onion, diced
  • 25 g | about 3 - 4 cloves garlic, crushed
  • 175 g | about 1 small boneless, skinless chicken breast, diced or sliced
  • 1 tsp Worcestershire sauce or soy sauce
  • 5 sprigs fresh thyme or 1 tsp dried
  • 2 bay leaves
  • 1/2 tsp oregano
  • 1/2 tsp basil
  • 1/2 tsp smoked paprika
  • salt, pepper to taste
  • olive oil

Saute onion and garlic over moderate heat until brown. Add spices, cook until fragrant, about 45 seconds. Add broth, chicken, carrots and potatoes. Bring to a boil, reduce to a simmer and cover. Cook for 15 minutes. Add cabbage and Worcestershire or soy. Taste and adjust seasonings. Simmer for another 15 minutes or until cabbage is tender. Serve with dark bread and sour cream.

Spicy Asian Slaw

Spicy Asian Slaw

Since I've been a day off all week, I decided to just keep it going. I'll resume my normal posting schedule on Monday.

My husband and I eat a lot of green cabbage. It's cheap, nutritious and very filling. It can be a challenge some days to make sure he's full and doesn't feel snacky after a meal. Cabbage helps ensure that he feels full and doesn't overeat snacks. (It helps me too!)

Often, we do something simple like grated cabbage, carrot and roasted corn with a simple vinaigrette. Or possibly just cabbage and carrot. That can get old pretty quickly, so I've been keeping an eye out for interesting variations to incorporate into our menu.

In one of the issues of Cooking Light I received this year, they had an entire section devoted to cabbage salads, which seem to be referred to as 'slaw'. I guess I never quite made the leap from "cole slaw" to "slaw" as a reference to shredded cabbage salad.

In any case, we tried this one and were rather happy with it. It's peanutty and spicy, crunchy and tasty. Adjust the chile paste to suit your taste - I preferred mine without quite as much spice as the original, so I started at 1/2 tsp.

Spicy Asian Slaw

Spicy Asian Slaw [printable recipe]

Adapted from Cooking Light
Serves 2

  • 1 c grated carrot
  • 3 green onions, thinly sliced
  • 4 c grated green cabbage
  • 1 1/2 tbsp seasoned rice vinegar
  • 2 tsp creamy peanut butter
  • 1 tbsp soy sauce
  • 2 tsp lime juice
  • 2 tsp canola oil
  • 1/2 tsp sambal oelek (chile paste) or more, to taste
  • 2 tbsp chopped peanuts (optional)

Combine carrot, green onions, cabbage and peanuts, if using, in a medium bowl. Whisk together remaining ingredients in a small bowl and pour over the vegetables. Toss well to combine.