Asian Pear Spinach Salad with Maple-Cider Vinaigrette

Asian Pear Spinach Salad

They say, "Necessity is the mother of Invention."

We had planned to have a spinach salad with all sorts of goodies, including some asian pears we picked up on sale. We then suddenly discovered that we were out of any type of dressing, even our favorite Ranch mixes we keep for emergencies! In fact, we were out of garlic, so we couldn't even make our usual red wine vinaigrette. (It goes without saying that we were also out of shallots. This happened the day before our major grocery shopping trip of the month, if you can't tell.)

A mad scramble for a workable dressing promptly ensued. It had to be fast and incorporate very few ingredients, preferably all staples that we still had in the pantry. My husband found this one on MyRecipes.com and it worked out beautifully. It's well-balanced between sweet and tart, pairing up well with the sweet asian pears and the bite of red onions.

Asian Pear Spinach Salad [printable recipe]

Serves 2
  • baby spinach
  • 1/2 asian pear, seeded/cored and sliced very thinly
  • 1/4 cup minced red onion
  • 6 sun-dried tomatoes, diced
  • shredded Manchego, Pecorino Romano, ricotta salata, etc.
  • sunflower seeds, soy nuts or other crunchy salad topping
  • Maple-Cider Vinaigrette
Toss all together. Serve.

(I love salads, they're so easy to put together. As long as everything makes it in the bowl, you're home free.)

Maple-Cider Vinaigrette [printable recipe]

From Southern Living
  • 8 tsp cider vinegar
  • 1 tbsp maple syrup
  • 1 1/2 tsp Dijon mustard
  • 1/4 teaspoon salt
  • 1/4 teaspoon pepper
  • 1/3 cup olive oil
Whisk together first 5 ingredients. Gradually whisk in oil until completely blended. Cover and refrigerate up to 3 days.

OR Combine all ingredients in a vinaigrette shaker or a small sealable jar. Shake well until completely blended.

Homemade Pizza - Garlic Lovers' Extravaganza

Garlic Lovers' Extravaganza Pizza

A little while ago, an independent pizza chef posted an "Ask Me Anything" post on reddit.com. It was an interesting read and he also posted his recipe for pizza dough which rests in the fridge overnight. (If you like reading about the behind-the-scenes life of chefs, you should read the entire thread.)

It looked really good, even if cutting it down was a bit of a hassle. We wound up making one-sixteenth of the original recipe to get one medium pizza for two. One thing I'd like to do is make maybe one-fourth of the original recipe and freeze three crusts for later once they come out of the oven and are ready to be topped. Then it seems like it would be just like those Boboli crusts you can pick up in the store -- only really tasty and yummy in addition to being really fast.

Now, this crust takes 24 hours to make, so you can't just start on it a few hours before dinner, but it does make for a very easy crust recipe. It's just about as easy as those pizza crust mixes in boxes at the store -- but it tastes a hell of a lot better. We're both really happy with how this crust came out - nicely fluffy without being too thick (similar to a hand-tossed crust at one of the major pizza joints), with good texture and excellent flavor, thanks to the long, slow rise.

Par-baked Pizza Crust

Easy Overnight Pizza Crust [printable recipe]

Adapted from TheJFK's base recipe on reddit Makes 1 medium (~12") pizza crust
  • 1 1/2 cup all-purpose flour
  • 3/4 tsp active dry or instant yeast
  • 1/2 tsp honey
  • 3/4 tsp olive oil
  • 1/2 cup warm water (105F -115F)
  • 1/2 tsp salt
  • 1 tsp thyme (optional!1)
  • 1 tsp garlic powder (optional!)
Combine all of the dry ingredients into a medium bowl. Mix well with your (clean) hands, then add honey and oil. Mix those in and begin slowly adding water, mixing thoroughly. You may need a bit more flour to bring it from a sticky mass into a nice, elastic dough. Once it's elastic, put a lid on the bowl and stuff it into the back of the fridge. Leave it there overnight.

The next day...

Dust a clean worksurface with cornmeal. Take out the dough and stretch it in your hands, carefully stretching it into a circle. If you're good with pizza dough, you can just toss it around into a pizza crust. I am not that good so I use a rolling pin and roll it out into a vaguely pizza-shaped crust. You want this very thin as it will poof in the oven. The cornmeal will act like little ball bearings, making it easy to slide the pizza on and off the stone, besides adding flavor and texture to the crust.

Preheat the oven to 425F and make sure your pizza stone is already inside. (Don't have a stone? Bake it on a pizza pan or baking sheet.) Bake the pizza crust for 5 minutes, then remove and top with sauce and toppings. Bake the finished pizza for about 9 to 11 minutes.

Notes:

  1. The spices are optional - this is what I used this time. TheJFK swears by fennel seeds in his. Next time, I'm thinking about dried minced garlic or caraway seeds.

Toppings Galore

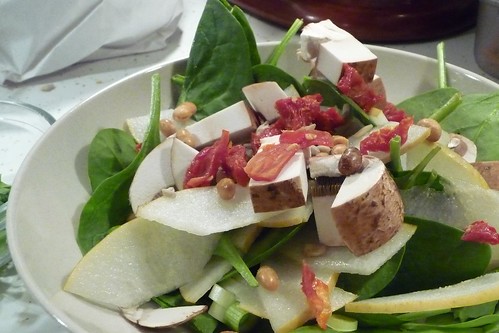
Everybody has their own set of favorite toppings. When we go out for pizza, I almost always want pepperoni, but when we make it at home, I go for something a little more extravagant.

Our homemade pizzas often incorporate chicken, bacon, onions and garlic. This time, we decided to go with bacon and when we saw cured pork jowl bacon at Winco, my husband was thrilled. He loves this cut of pork and frankly, I was surprised to see it in a megamart in this state. It's rather interesting as bacon - the fatty parts are more similar to lean in texture than your typical bacon fat which I find difficult to eat. On this pizza, it was superb, adding just the right amount of meatiness to the pizza.

If you've been reading here regularly, you already know we're garlic fiends. Here's how we decided to top our first batch of homemade pizza dough.

Garlic Lovers' Extravaganza Pizza [printable recipe]

Makes one 12" - 14" pizza
  • 1 recipe Easy Overnight Pizza Crust
  • 1/2 small can of tomato sauce
  • 1/2 head of garlic, roasted and crushed
  • 1 tsp marjoram
  • 1/2 tsp crushed red chili pepper flakes
  • 1 roma tomato, sliced
  • 1 small onion, sliced
  • 1 cup fresh basil, thinly sliced
  • 3 cloves garlic, thinly sliced
  • 4 slices cured pork jowl bacon
  • 1 cup shredded cheese
  • 1 mushroom, thinly sliced
  • cornmeal
Preheat oven to 450F.

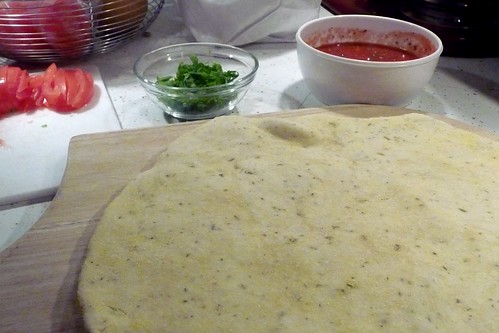
Combine tomato sauce, roasted garlic, marjoram, red pepper flakes and half of the fresh basil shreds in a small bowl. Stir well and set aside. Over moderate heat, fry bacon and onion until tender. Drain and set aside.

Spread dough with your hands into a circle on a cornmeal-dusted surface and roll/stretch out into a thin 13" diameter round1. Bake the crust on a baking stone for 5 minutes, then remove.

Spread the sauce over the crust evenly to about 1" from the edge. Layer on onions, bacon, tomato slices, raw garlic slices, mushrooms and half of the remaining basil shreds. Top with cheese, sprinkling over evenly.

Bake for 9 to 11 minutes, until everything is golden. Remove, sprinkle the remaining basil over the top and try to share with others.

Notes:

  1. I admit, we don't know how to do the whole hand-tossed thing, so we just stretch the dough into a circle and then roll the rest of the way. This could be considered heresy in some parts.

Quinoa with Oyster Mushrooms and Adzuki Beans

Quinoa with Oyster Mushrooms and Adzuki Beans

I love bulk food sections in grocery stores. Sadly, most of the ones here have only a few bins filled with a candy concoction that rots your teeth as you walk by. At Winco, however, there are rows and rows of shiny bulk bins filled with almost everything I could possibly want.

Sugar and flour for cheaper than pre-bagged? Check. Most of the spices I use all the time? Check. Chocolate chips and candy melts? Check. Cat food? Check. All sorts of dried beans and pastas? Check and double-check!

They also have little recipe cards scattered throughout to give you an idea of how to use some of the odder or less familiar ingredients. I found one for adzuki beans which I bought because the tiny red beans with wee white stripes were just so damn cute. By happy chance, the recipe called for another ingredient we'd been wanting to try: quinoa.

Boy, am I glad we did. The adzuki beans were packed with intense flavor all out of proportion to their size. The quinoa was delicious -- but I admit, we mixed it 50/50 with bulgur because we didn't have quite enough quinoa on hand. Now, this one doesn't call for any spices and to be honest, it doesn't really need them. Between the flavors of the vegetables and adzuki beans, it's got plenty. But, if you want some spice, I'd recommend a mix of cumin and mint.

This one is definitely going into our regular rotation as soon as we pick up some beans and quinoa... in bulk.

Quinoa with Oyster Mushrooms and Adzuki Beans [printable recipe]

Adapted from a recipe provided by Winco Foods Serves 2 with leftovers
  • 1/2 tbsp olive oil
  • 1 tbsp butter
  • 4 green onions, finely chopped
  • 2 cups vegetable or chicken broth
  • 1 cup quinoa1
  • 1 large carrot, sliced
  • 1/2 ounce dried oyster mushrooms OR
  • 4 ounces fresh oyster mushrooms, finely chopped
  • 3/4 cup dried adzuki beans, rinsed and picked over
  • salt and pepper
Prepare the beans: Soak beans in salted water overnight2. Drain and rinse, then place in a medium pot with plenty of water to cover. Salt water liberally and bring to a boil. Cook for 45 minutes or until the beans are tender. Drain and set aside.

Cooking the rest: Over moderate heat, heat the olive oil in a nonstick skillet. Add the onions and carrots, cook for about 3 minutes. Remove to a rice cooker3. Add the butter to the pan and saute the mushrooms for 5 minutes. Remove to the rice cooker. Stir in quinoa and broth into the veggie mixture in the rice cooker, add salt and pepper, then set it to Cook.

When ready, fluff with a fork and serve with a side salad.

Notes:

  1. Other substitutes: bulgur, couscous or millet. Adjust cooking time as necessary. A 50/50 mix of bulgur and quinoa tastes great and does not require any shift in time.
  2. Yes, really. According to this post on GoodEater.org, which, by the way, I am so going to make, soaking and cooking the beans in salted water helps preserve their skins and prevent bean blowouts.
  3. I love my rice cooker but if you don't have one, just use a lidded pot on the stove and simmer the mixture for about 15 - 20 minutes or until the liquid has been absorbed.

Ratio: Variations on the Theme of Pancakes II

Whole Wheat Apple Pancakes

Second in the Ratio: Pancakes series. I'm participating in the Ratio Challenges this year, hosted by Seattlejo of Fat and Crafty, and experimenting with ratios from Michael Ruhlman's Ratio: The Simple Codes Behind the Craft of Everyday Cooking. Read more about my experiments here.

The Creamy Stout Rye'cakes had come out pretty well. But I thought something sweeter would be a good application. I had recently purchased a big bag of apples and used that as my starting point for inspiration. What better than a twist on a traditional dessert for a Sunday brunch? It sounded good, so off we went.

Depending on how you like your apple, you might want to grate the apple instead of mincing it. I think grating it might allow it to better blend in with the pancake. These came out very nicely and made for an excellent breakfast. Using the whole wheat pastry flour made for fluffy, soft pancakes without being too overpoweringly "wheaty". Spelt flour would also be an excellent choice, especially if you're gluten-free.

Whole Wheat Apple Pancakes [printable recipe]

Makes about 6 pancakes
  • 3 ounces whole wheat pastry flour
  • 1 ounce all-purpose flour
  • 4 ounces milk
  • 1 large egg
  • 1 ounce butter, melted
  • 1.5 tsp baking powder
  • salt
  • 1.5 tbsp brown sugar
  • 1/4 tsp cinnamon
  • 1/4 tsp nutmeg
  • dash of ground clove
  • 6 ounces apple, peeled and minced
  • powdered sugar (optional)
Combine wet ingredients in a small bowl, combine dry ingredients in a medium bowl. Add wet to dry and stir well, then add diced apple. Add more milk to thin if desired or needed. Heat a lightly oiled pan over moderate heat and fry until golden. This is definitely one to be served with powdered sugar and/or maple syrup.

Verdict on the Whole Wheat Apple Pancakes:

This turned out really well, but the apples definitely need to be minced. I think it might even be better if they were lightly cooked to soften them up. Another really good way to incorporate the apples would be to use apple preserves or top with apple jam.

Interestingly enough, very little milk had to be added to thin out the pancake batter to a proper consistency. Given that, over the past few days, our ambient humidity has been over 85% with lots of fog, rain and snow, I believe that humidity is very much a factor in this ratio as is the weight of your egg. An egg for the purposes of the ratio needs to weigh 2 ounces. Some large eggs qualify but an extra-large egg seems to be the closest to 2 ounces according to the reports from other folks in the Ratio Wave.

Sklandu rauši

Sklandu rauši

Every so often, I post a recipe from Latviešu ēdieni by Ņina Masiļūne.

My husband has been jonesing for these little pastries for a while and earlier this week, he decided he'd make them for dessert on one of the nights we had a full Latvian meal. They're not very sweet, relying primarily on the natural sweetness of carrots and the rye crust can be very difficult to cook just right, but they are interesting little pastries nonetheless.

There are a lot of variations, including potato versions and mixed-potato/carrot versions, but this time we went with 100% carrot. It may seem a bit odd, but these little guys are a nice snack to incorporate if you're on a diet, since you get whole grains and vegetables plus a sweet dessert for about 150 calories or so per pastry.

Sklandu Rauši [printable recipe]

Makes approximately 12 Sklandu rauši

Rauši base

  • 300 g rye flour
  • 120 g water
  • 30 g lard
  • 7 g sugar
  • salt
  • 1 egg, beaten

Carrot Filling

  • 400 g carrots, peeled and cut into large chunks
  • 50 g sugar
  • salt
  • 25 g sour cream
  • 2 eggs
  • 15 - 25 g flour

Boil carrots until tender. Drain well and pat dry. Puree in a food processor, food mill or ricer. Combine sugar, salt, sour cream, eggs and flour with the carrot puree1 and set aside.

Preheat the oven to 350F.

Preparing the Dough: By Hand: In a large bowl or on a clean worksurface, sift together flour, sugar and salt then add lard. Mix the lard into the flour with your fingers until it's reasonably uniformly crumbly. Make a well and pour in the water, mixing it together until a dough begins to come together. Knead into a stiff, but rollable, dough.

Using a Food Processor: Combine flour, sugar and salt in the bowl of a food processor fitted with the chopping blade. Pulse two or three times to sift ingredients together. Add lard in small chunks. Pulse 8 - 12 times, just until the mixture becomes crumbly. Pour in the water and pulse another 8 - 12 times until the dough forms. Remove and knead by hand for a couple of minutes until the dough is stiff and workable.

Roll out the dough on a floured surface to about 1/8th inch thickness. Cut out rounds with a large (4" to 5") biscuit cutter. Bring up about 1/2" of the sides to form a 1/2" rim, pleating as you go, to produce a small "dish." Pleating will enable the border to stay up and contain the carrot mixture. Arrange on a parchment or silicone-lined half sheet pan.

Sklandu rauši dough formed This is about what it should look like when you're done.

Preparing the pastries Spoon the carrot mixture into each little dough "dish" until it almost reaches the top. Brush each carefully with beaten egg.

Bake for 25 - 30 minutes until the dough is crumbly and (hopefully2) the carrot filling is browned.

Notes: 1. If your carrot puree comes out overly wet, you may need more flour or to drain off a bit of the carrot juice so that it is somewhat dry. 2. We didn't get the carrot to brown before the dough had gone too far, so I still need to work out some bugs here.

Stir-Fried Spicy Something Sauce

Stir-fried Spicy Something Sauce

Today's recipe is an oddly-titled one, I know; this is because you can use just about any type of protein in it. My original recipe called for shrimp, which was great, then I made it with tofu, which was better, but I usually use chicken or pork simply because that's what I almost always have on hand. All of them are delicious. This recipe is very easily made vegan by swapping out the honey for your preferred sweetener. (Stir-fries are great, they can be adapted to suit any range of tastes and preferences.)

When we saw blood oranges available at our local grocery, we immediately grabbed a couple and decided to make this. The darker flavor of the blood orange works very well with this sauce. However, you can substitute regular oranges, or even use a few different types; I particularly enjoyed using a tangelo and a blood orange for the sauce of one meal.

One thing I learned to my dismay when we made this for dinner the other night is that when you start a new jar of chili paste, it's much, much stronger than the old jar that'd been hanging around for a while. I put in my original recipe's amount and we just about choked on the spiciness. So, be careful with the chili paste and add only enough to bring it to your desired level of heat.

Stir-fried Spicy Something Sauce [printable recipe]

Serves 2

  • 3/4 lb shrimp, chicken, tofu or other protein source
  • 1 tbsp cornstarch
  • 3 small blood oranges, juiced
  • 1/3 c green onions, chopped
  • 5 cloves garlic, minced
  • 2 tbsp grated ginger
  • 2 tbsp canola oil
  • 1/2 to 1 tbsp chili paste with garlic
  • 2 tbsp rice wine vinegar
  • 4 tbsp honey
  • 4 tbsp soy sauce

Toss chopped protein with cornstarch in a small bowl, set aside.

Whisk together juice, soy sauce, honey, vinegar, chili paste in a small dish. Set aside.

Heat oil in large skillet over med-high heat. Add minced garlic and ginger, stir-fry for 15 sec until fragrant. Add the cornstarch and protein mixture, stir-fry for 3 - 6 minutes, depending on how long the protein needs. Figure about 3 minutes for shrimp or tofu, 4 - 5 for other meats. Add the juice mixture. Cook for 2 minutes or until sauce thickens and the protein is fully cooked, stirring frequently.

Garnish with green onions and serve over stir-fried vegetables and rice.

Ratio: Variations on the Theme of Pancakes I

I'm participating in the Ratio Challenges this year, hosted by Seattlejo of Fat and Crafty. Every two months, we experiment with a different ratio from Michael Ruhlman's book: Ratio: The Simple Codes Behind the Craft of Everyday Cooking.

Seattlejo wrote:

The basic ratio for pancakes is:
  • 2 parts flour
  • 2 parts liquid
  • 1 part egg
  • 1/2 part fat
For every 5 oz of flour add 1 tsp baking powder, pinch of salt and 1 tbsp of sugar.

(This was taken from the story in Chow.)

Think of the flours you can use, different liquids, savory versus sweet, how big of a batch , how small of a batch can you make?

Go forth and make pancakes!

In the interview at Chow, Ruhlman notes that a large egg is approximately 2 ounces. My husband and I usually figure one egg per person (also recommended by Ruhlman in the same interview) if the batch is to be the main portion of the meal.

I sat, staring at my screen. This was a completely new way of thinking about recipes for me. What could I do with what I have in the pantry? What flours and fats should I use? How will the different protein counts of the various flours affect the final product?

Let's find out. All of the ratios I came up with were figured off of the original pancake ratio; no fritters yet. All of them mix the wet and dry ingredients together separately before combining both, then frying over moderate heat until golden brown and delicious.

I came up with four ratios to try off the bat. I never attempted to make more than enough for two because, well, we don't have a dog or kids to justify a larger batch. I did, however, find that a batch made from two eggs made about a dozen pancakes -- enough for four! I cut the ratios down to 1-egg ratios after the first experiment because two eggs' worth is just too much.

I also found that up to 1/2 cup of water could be necessary to thin it to a pancake batter consistency, depending on the ingredients I chose. Perhaps I was going with liquids that were too dense.

I'm only posting one today, but the next three will be featured over the course of February. (And in March, a whole new ratio will be selected.)

The first ratio incorporates my husband's love of three things: rye, beer and honey. Stouts always seem to be described as creamy, particularly the foam, so I used cream for the other half of the liquid. I sprinkled toasted walnut pieces over the cakes to add some crunch to this grown-up griddlecake.

Creamy Stout Rye Pancakes

Creamy Stout Rye Pancakes [printable recipe]

  • 2 oz rye flour
  • 3 oz whole wheat flour
  • 3 oz cake flour
  • 4 oz stout beer, like Beamish Irish Stout
  • 4 oz whipping cream
  • 2 large eggs
  • 2 oz melted butter
  • 1 1/2 tsp baking powder
  • salt
  • 1 1/2 tbsp honey
  • walnuts, chopped
  • 1/2 cup water
Combine wet ingredients in a small bowl, combine dry ingredients in a medium bowl. Add wet to dry and stir well. Add water to thin if desired. Heat a lightly oiled pan over moderate heat and fry until golden.

Verdict:

These came out beautifully with a light beer flavor. We topped them with drizzled honey and had them for lunch. This ratio made a dozen 4" pancakes -- more than enough for two, plenty for three or four. This batter came out too thick for my taste and needed 1/2 cup of water.

Three-Bean Vegetarian Chili

Three-bean Vegetarian Chili

Sometimes, it can be hard to find healthy meals that fill you up too, or at least, it can feel that way to me. This is a super tasty, filling and low-calorie vegetarian chili that I found in the latest Cooking Light magazine. Talk about getting your veggies in! I analyzed the recipe as written below using the Recipe Analyzer and it came back at less than 400 calories at 6 servings and just under 550 calories if it feeds four.

Now, I'll warn you, it does take a while to make, especially if you're going to cook your own beans. It's worth it, trust me. We made this over the course of the afternoon after returning from our walk and the thick, hearty chili was just right for a cold and snowy evening.

While I do show this in its chunky, fresh from the pot state, we both found that we preferred it after pureeing for a few seconds. It was smoother and more to our taste - however, I know that many chilis are very chunky, so puree or not as you like.

Three-Bean Vegetarian Chili [printable recipe] [latviski]

Adapted from the January 2010 issue of Cooking Light
Serves 4 - 6

  • 3 oz / 1/2 cup dried black beans1
  • 3 oz / 1/2 cup dried great northern beans
  • 3 oz / 1/2 cup dried kidney beans
  • 2 red bell peppers2
  • 2 cups (about 1 small yellow) onion, chopped
  • 2 tsp cumin
  • 1 tsp crushed red chili flakes
  • 1 tsp paprika
  • 1/2 tsp smoked paprika (if available)
  • 1/2 tsp salt
  • 4 - 6 cloves of garlic, sliced
  • 2 cups vegetable broth
  • 3 cups cubed, peeled winter squash (about 1 medium-large acorn squash)3
  • 800g / 28 oz diced tomatoes, undrained
  • 1/4 cup white wine
  • 1 tbsp olive oil

Preparing Beans4: Soak beans in a jar full of water overnight. Drain beans and pour into a large pot, covering with lots of water, then bring to a boil. Reduce to a simmer and cook, stirring occasionally, until beans are tender. (In my case, it took about 2 hours or so.)

Preparing Bell Peppers: Cut peppers in half and remove seeds, stems and membranes. Place skin-side up on a foil-lined baking sheet and broil until blackened - about 12 minutes. Place in a paper bag and let stand for 10 minutes. Peel away the blackened skin and chop finely.

Preparing the Chili: Heat oil in a large pot over low to moderate heat. Add onion and cook for 10 minutes until nicely browned. Stir in cumin, crushed chili flakes, paprika(s), a pinch of salt and garlic, plus a splash of white wine, then cook for 2 minutes. Add peppers, broth, squash and tomatoes, bring to a simmer and cook, stirring occasionally, for about 20 minutes. Add cooked beans and continue simmering for an additional 25 minutes. Puree about a third to a half of the chili using an immersion blender or blender/processor to make it thick and tasty. Serve with sour cream.

Notes:

  1. Obviously you can use whatever mixture of dried beans you like. Or, you can use canned - the ratio is 1/2 cup dried beans (makes approximately 1 1/2 cups cooked) to 1 15oz can of drained, canned beans.
  2. Or, you can use about 4 canned roasted red peppers. Sometimes red bells are just too expensive to buy here, so I always have some canned on hand.
  3. In this case, I used acorn, but you could use butternut, delicata, hubbard or even pumpkin. Or just about any other winter squash I've forgotten to name here, except maybe spaghetti squash. That I don't think would work.
  4. I use the overnight soaking method, but you can also do a "quick soak." I don't like it because it's more work and takes just as long as the overnight soaking method! It's really only useful when you forget the put the beans in a jar the night before.

Veģetārais pupiņu čili-sautējums

Three-bean Vegetarian Chili

Veģetārais pupiņu čili-sautējums [printable recipe]

Adaptēts no 2010. gada, Janvāra "Cooking Light" žurnāla. 6 porcijas.
  • 250 g pupiņu
  • 2 sarkanie, saldie pipari
  • 1 sagriezts sīpols
  • 10 ml ķimeņu pulvera
  • 5 ml paprikas pārslas vai čili pulvera
  • 5 ml saldās paprikas pulvera
  • šķipsna sāls
  • 4 - 6 sasmalcinātas ķiploku daiviņas
  • 0,5 l dārzeņu buljona
  • 400g kubiciņos sagriezta ķirbja
  • 800 g mizoti, kubiciņos sagrieztu tomātu
  • 60 ml baltvīna
  • olīveļļa
  • skābais krējums
Pupiņu gatavošana: Sālsūdenī vāri mērcētas pupiņas līdz tās ir mīkstas (apmēram 2 stundas).

Piparu gatavošana: Pārgriez piparus uz pusēm un izņem sēklas. Ar griezuma pusi uz leju liec cepešplātē (lai atvieglotu mazgāšanu cepešplātē vari ieklāt alumīnija foliju) un 10 - 12 minūtes cep 250° temperatūrā, apmēram 15 cm no cepeškrāsns augšas, līdz miziņa kļūst melna. Ievieto papīra maisiņā vai slēgta traukā un 10 minūtes ļauj atdzist. Nomizo un smalki sagriez.

Sautējuma gatavošana: Uz lēnas uguns, apmēram 5 litru lielā katlā, uzkarsē eļļu. Katlā cep sīpolus līdz brūni, apmēram 10 minūtes. Pievieno ķimeņu pulveri, paprikas pārslas un pulveri, sāli, ķiplokus un vīnu, karsē 2 minūtes. Kopā ar pipariem, buljonu, ķirbi un tomātiem sautē 20 minūtes. Pievieno vārītās pupiņas un turpini sautēt vēl 25 minūtes. Ja sautējumu vēlies viendabīgāku, daļu vari sablendēt. Pasniedz ar, vai bez, skābo krējumu.

Double Chocolate Muffins

Double Chocolate Muffins

The other day I was having serious chocolate cravings. I didn't want to bake cookies because my new silicone-finned beater blade hadn't arrived yet (and still hasn't). I didn't want to make mini-pies because I was lazy and didn't want to fiddle with mini-crusts (nor did I have any of the cheap mini Keeblers graham cracker crusts on hand). It was late, I was tired but I really needed some chocolate.

Enter the muffin.

Muffins are fast - just stir the wet ingredients into the dry ingredients, shove some muffin liners into the muffin pan, scoop and bake. No mixer needed and very little waiting required.

I began looking through my shelves for a good double chocolate muffin recipe. I went through several without finding anything then realized that my Alton Brown cookbook on baking probably had one. Sure enough, it did and was exactly what I'd been looking for. (Have I mentioned how much I love his cookbooks? There's always weight and volumetric measurements!)

These muffins come out very rich and chocolatey. I needed two glasses of milk with my first muffin but it was oh so good. Since the batch made almost two pans' worth, I stirred walnuts into the second batch for that nutty crunch. Even though I messed up while measuring ingredients by forgetting to halve the leaveners, they still came out beautifully.

Double Chocolate Muffins [printable recipe]

Adapted from Alton Brown's I'm Just Here for More Food: Food x Mixing + Heat = Baking
Makes 6 - 9 muffins

Dry Ingredients:

  • 135 g / 1 cups all-purpose flour
  • 50 g / 1/4 cup + 2 tbsp unsweetened cocoa
  • 1/2 tbsp baking powder
  • 1/2 tsp baking soda
  • 1/2 tsp salt

Wet Ingredients:

  • 130 g / 1/2 cup + 2 tbsp sugar1
  • 55 g / 2 oz / 4 tbsp melted butter
  • 1 large egg
  • 110 g / 1/2 cup buttermilk
  • 1 tsp vanilla extract

Additions:

  • 90 g / 1/2 cup semi-sweet chocolate chips
  • 50 g / 1/4 cup chopped walnuts (optional)

Preheat oven to 375F. Place muffin/cupcake liners in your muffin pan or grease and flour the pan.

Whisk together the dry ingredients. Whisk together the wet ingredients in a separate bowl. Add the wet ingredients to the dry ingredients and stir just until the batter begins to come together. Don't worry about lumps or smoothness, just bring it together and stop. Add in the extras you want to use, stirring just long enough to mix them throughout.

Drop the batter into the cups. (A disher makes this very easy.) The cups should be full. Place in the oven and turn up the temperature to 400F. Bake for 18 - 20 minutes or until a toothpick inserted in the center comes back clean2.

As soon as you can, remove the muffins to cool on a rack. Serve immediately or store in an airtight container. Muffins can also be frozen.

Notes:

  1. In baking, sugar is considered a wet ingredient.
  2. In other words, do the "cake test" on it. Be careful of hitting a chocolate chip which can throw off your results.