Garlic Sauce

Where I live, fry sauce reigns supreme.

Depending on which local variant is followed, fry sauce might be a simple mixture of ketchup and mayo or a spicy bbq, ketchup and mayo delight. It took me years to give in and start doing as the Romans do, but I'm definitely a convert. I've been happily dunking my french fries into fry sauce for the better part of five years now.

Until I went to Liepāja to see my (then-future) husband and had a hamburger craving, that is.

It's not really surprising, though it is embarrassing. I'm conscious of the stereotypes surrounding American tourists; hell, my mother-in-law was convinced that all I would eat there would be grilled chicken and corn flakes. Actually, it took her a few weeks to finally agree that when I said I liked something, I wasn't just saying it. Of course, it took finding something I didn't like to convince her. After that, she started making sure I tried lots of stuff trying to get me to repeat that! (She did eventually give up once I tried one of her favorites, barbecued, gellied lamprey, and pronounced it good.)

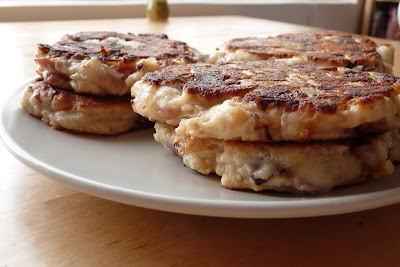
But that day, I had to have a burger. My husband shrugged and suggested the little burger place run by the Fontaine Hotel on the promenade of the main canal. It's a total dive, and I mean that in the best possible way. Dark, with very little seating at a scarred, wooden bar, tattooed and colorful characters man the grill and ferry food about in the open kitchen. The menu is a mix of American favorites: burgers, hot dogs, chinese stirfries and mexican burritos, with a bit of pizza thrown in for good measure. I never did try their other offerings, but I can attest that they grill their burgers with a splash of soy sauce over the thin patties, serving them up with thick slices of tomato and lettuce.

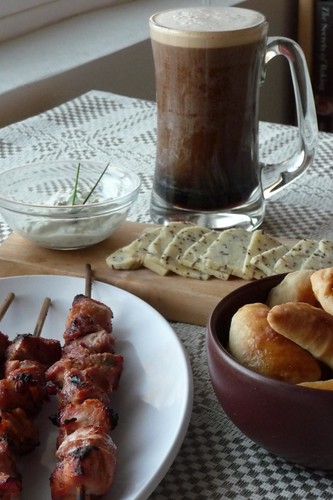
And of course, you have to have fries with a burger. These were shoestring, fried crisp and tender before being tossed with seasoned salt, dumped out onto a little tray and loaded down with a thick garlic sauce.

This garlic sauce made everything better. The burger was good, but the fries with that sauce were divine. We wound up having garlic sauce cravings and went back again before we left Liepāja for more. Suddenly, my old fry sauce stand-by was boring. How could I have gone all these years dunking into the same old sauce and never even thinking about one of my all-time favorite foods' ability to make just about anything better?

Unfortunately, chives are expensive during the winter and my attempt to grow them fizzled out when our kitten decided seedlings made great snacks and the dirt was fun to dig around in. (The basil only narrowly survived and the aloe vera was a dead loss.) The local groceries weren't much better, so we remained sadly sauceless while we waited for the farmer's markets to open. We did find one seller offering them, though they almost seem like she just chopped off young green onion shoots by mistake. At last, it was time to make our own garlic sauce.

Ķiploku mērce (garlic sauce)
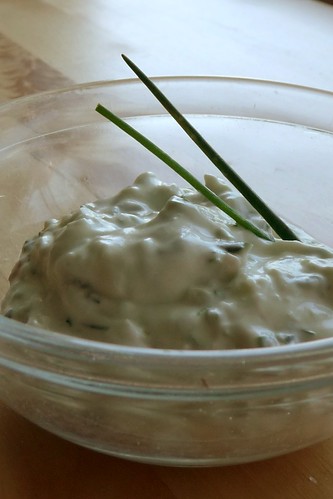
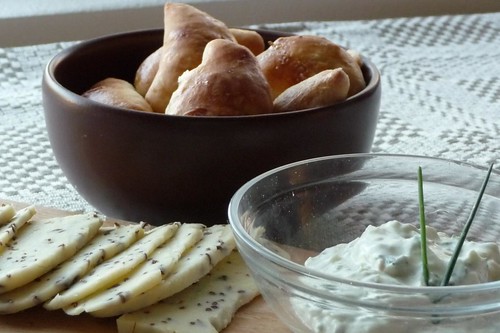
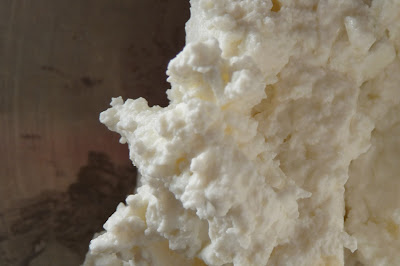
Garlic sauce, good for what ails you.

This sauce is far better than the Fontaine's, is not for the garlic-faint-of-heart nor for vampires, and should really be stored in small containers to prevent oneself from accidentally consuming the entire batch. Best on potatoes, burgers, veggies and anything else that can act as a sauce substrate.

Rozentāli Garlic Sauce 1 whole head of garlic, roasted, plus 4 cloves, raw 3 - 4 tbsp chives, minced or the green tops of green onions, minced 2/3 cup sour cream 1/3 cup mayonnaise salt, to taste

Pan-roast the head of garlic. To do this, smash the head with your palm or the flat of a large knife to crush the head and break it apart. Do not skin the cloves but remove any of the loose white papery skins hanging about. Place a medium to small cast iron skillet on medium heat and dump all the cloves in. Shuffle them around periodically so they don't burn, though they will probably blacken in spots. It'll take about 10 - 15 minutes to roast them completely.

Using a mini food processor, mince the roasted garlic, raw garlic and chives. Remove to a small bowl and stir together with mayo and sour cream. The resulting sauce should be very garlicky and kept in the fridge until ready to serve.

Makes about 1 cup.

Notes: 1. Please, do yourself a favor and read the label on the sour cream. You want the real stuff, the good stuff, the stuff with just cream listed as an ingredient. I recommend Daisy Sour Cream, my favorite fantastic sour cream. 2. For that matter, read the label on the mayo too. Get the good stuff or, better yet, make your own. Your taste buds will thank you, I promise.

Watermelon-Feta Salad

It's summer and to me, that means watermelon.

Juicy, red, sweet and ripe, watermelon is one of the best foods to have in these dry parts. We like to buy the seedless melons and chop them up into easy to grab portions. Sometimes we make a bowl of it and a bowl of popcorn and nosh our way through a movie.

Last year, Elise at Simply Recipes posted this neat watermelon salad and it's just about time to start making it again. With the summer heat now in full swing, we've been chowing down on watermelon like there's no tomorrow. Plus, with the best feta I've ever had just a short distance away, a fresh bag of lemon mint from the farmer's market, and half a seedless watermelon ready to be eaten, there's no time like the present for this salad.

Normally, I alter just about every recipe I come across to suit my tastes but this one is just perfect the way it is. Thanks Elise!

(Just one caveat... Don't do what I did and figure since you're out of parsley, you'll substitute cilantro "just this one time". I should have gone and gotten more parsley.)

Watermelon-Feta Salad [printable recipe]

From Simply Recipes

  • 1/2 cup chopped red onion
  • 1/2 cup lime juice (4-6 limes, depending on how big and juicy the limes are)
  • A quarter of a medium sized watermelon, rind removed, black seeds removed (if there are any), chopped into 1-inch cube-ish pieces, about 8 cups
  • 1/2 cup crumbled feta cheese
  • 1/2 cup fresh mint leaves, chopped
  • 1/2 cup fresh parsley leaves, chopped

Soak the chopped red onion in the lime juice while you are prepping the other ingredients, about 15 minutes.

Gently combine all ingredients into a large serving bowl. Serve immediately. Salad will get soggy if kept overnight (or longer than say, two hours).

Priecīgus Līgo svētkus!

Priecīgus Līgo svētkus (Jāņi 2009)

Mm. Jāņi. Summer solstice. A great Latvian excuse to drink copious amounts of beer, eat large quantities of really great food, stay up all night and play with fire.

I don't expect to make it all the way through the night and local ordinances prohibit us from setting fires in our yard, but we do have plenty to drink and eat.

Šašliks

Šašliks (marinated pork shishkabobs)

Speķa rauši (pīrādziņi)

Speķa rauši (baked bacon & onion rolls)

Read more about how to make speķa rauši.

Speķa rauši, jāņu siers

Speķa rauši, Jāņu siers, ķiploku mērce (garlic sauce)

And ķiploku mērce, too. This is a sauce we first had at the Fontaine in Liepāja. It was their take on a creamy garlic sauce (even released in bottled form by Heinz, though I have not seen that here in America). We absolutely adored the Fontaine's version and promised ourselves we'd recreate it here. I may be biased, but I think our version today kicks the Fontaine's sauce's ass.

Read more about garlic sauce/ķiploku mērce here.

Fresh Jāņu Siers

Jāņu siers

Slices of Jāņu siers

Slices of Jāņu siers

Our cheese from yesterday hardened beautifully into what I can only describe as the texture of a young Cheddar or an aged Monterey Jack. It came out wonderfully and I already have plans for a pepper jack-style twist for later this summer. For the cost of 1 gallon of milk, this fresh, heat-aged cheese is well worth the effort.

Mmm.. Now I'm hungry again. I think I'll go grab myself another margarita and watch my husband grill us up another set of šašliks.

Jāņu siers

Fresh Jāņu Siers

Līgo vakars is tomorrow and we've been patiently waiting for our kefir biezpiens to finish drying so we could make Jāņu siers (Latvian Solstice caraway cheese) today.

Making this type of fresh cooked cheese is a semi-involved process that takes about an hour of active cooking time. We made a small cheese this year since it's just the two of us but it's great for starting out too.

As far as biezpiens goes, I'm working on solidifying the process for making biezpiens from kefir and will test how to make it from buttermilk. For now, check out the comments on Gateway Cheese and read the Latvian pankūkas post for details on pressing kefir cheese to make a basic biezpiens.

So without further ado.. Let's begin!

Jāņu siers -- Latvian Solstice caraway cheese [printable recipe]

Equipment Needed:

  • Dairy thermometer
  • Large pot, nonstick if possible
  • Deep 8" nonstick skillet
  • Wooden spoon (traditional) or silicone/heatproof nonstick spatula
  • Finely woven cheesecloth or coarsely woven flour sack towel
  • Large colander or sieve
  • Large bowl big enough to fit the colander
  • Small bowl
  • Slotted spoon
  • Large cutting board
  • Pitcher or storage container for whey
  • Two nesting tupperware containers to act as a cheese mold
  • Weight

Ingredients:

  • 9 ounces (250 g) biezpiens
  • 2 quarts milk, preferably whole
  • 1 to 1 1/2 cups kefir or buttermilk
  • 1 egg plus 1 egg yolk
  • 1/2 stick (50 g) butter
  • salt to taste
  • caraway seeds to taste

Preparing the Curds:

In a large pot over medium-low heat, heat milk until small bubbles start breaking the surface then add the kefir and biezpiens in small crumbles. Stir periodically, keeping the mixture hot but not simmering, around 160F. (I live at a high altitude, so your temps may vary.) Curds will begin to form around the biezpiens.

As the whey begins to clear, keep a close eye on things. It won't take long to go from mostly milk to mostly curds.

Once it's nicely separated, carefully lift out the curds with a slotted spoon into a cheesecloth-lined large colander set in a large bowl. Once you've removed most of the big curds, drain the bowl under the colander into a waiting storage pitcher for future use. Replace the bowl and carefully drain the remaining whey and curds into the colander. Drain the whey left in the bowl into your container. You can use this to make whey ricotta if you like or use it to add flavor in place of water. My husband loves to drink it cold!

You need to press out any remaining whey, so gather up the edges of the cloth and wind up the cloth to help squeeze out some whey. Don't be afraid to just grab on and squeeze too but be careful, it's hot!

Cooking the Curds:

Set the 8" deep skillet on medium-low heat and begin melting the butter.

Move to the cutting board and begin kneading the cloth-covered curds. Some whey will come out but it should be fairly dry by now.

In a small bowl, mix together the egg and egg yolk, along with caraway and salt to taste. You're looking for enough caraway to comfortably speckle the cheese which is probably a couple of tablespoons. Unwrap the cheese and add it, mixing it well with your hands.

Now that the butter is melted, place the caraway cheese in the pan and begin mixing in the butter.

The lower the temperature and the shorter the heating time, the more crumbly the cheese will be. Conversely, the higher the temperature and longer the heating time, the more solid the cheese will be.

Always keep the cheese moving. It will be very crumbly in the beginning.

Moosh it around, fold it, spread it, just keep it moving.

Eventually, it will stop crumbling and start becoming shiny and elastic, much like good bread dough. Keep going.

No, your arm won't fall off.

I hope.

Almost there!

Okay! You made it! Turn off the heat and spread a clean, damp bit of cheesecloth in your container you want to use as a mold. (I used a couple of Tupperware I had laying around.)

Forming the Finished Cheese:

Press the cheese out so it fills the mold nicely then fold over the cloth and drop the other container on top.

Fill it with something heavy. I used river rocks I bought at the local dollar store for a 50c a pound (there's about 6 lbs as shown). This will make your cheese harder.

Leave it out on the counter for a while so it can cool down then you can put it in the fridge to finish. Once it's cooled and had a chance to start forming a hard rind, take it out of the mold, unwrap it, sprinkle some kosher salt all over the cheese and rewrap it before placing it back under the weights in the mold. Don't touch for at least a few hours!

Now, grab one of those beers you have waiting for Jāņi tomorrow. You deserve it!

Honey, What's For Dinner?

Every Sunday, my husband and I hash out what will be on the menu for dinner over the upcoming week. At the same time, we examine what we have in the fridge, freezer and pantry that needs to be used up and write our shopping list for our Monday grocery run. We don't always make everything we set out to, as events will come up that interrupt our normal routines, like a parent wanting to go out to dinner with us or our celebrating making it through yet another hurdle in my husband's immigration to the US.

When we got married last December and were living together permanently (i.e., we'd finished moving him over from Latvia), we set out some menu goals for ourselves. Our goals for our lives over the next few years include losing weight and eating better, so a menu to keep us on track for our eating helps us meet both. In addition, we don't have a lot of money as we are both students and need to be fairly frugal in our purchases. Shopping with a list created from a menu helps reduce impulse purchases and wasted food which saves a surprising amount of cash.

We found, however, that setting up "rules" for our menu made us more likely to incorporate more variety in our diet and makes thinking up a menu much more fun. It also helps prevent "meal fatigue" from having the same set of standbys all the time. And, any new recipe we make that is a keeper gets added into the family recipe manager. (We use Gourmet, an open source recipe manager with nutrition analysis.)

The basic rules we try to follow every week are:

  • 1. At least one vegetarian dish per week.
  • 2. One seafood dish which may be fish, shellfish, etc.
  • 3. Two meals using pork, chicken or beef.
  • 4. One soup or salad.
  • 5. At least one random recipe, selected from food blogs, cookbooks, recipe emails or collections.
  • You might notice this only covers six meals out of seven. Every Saturday for the past several years, I have had dinner with my father. Usually we eat at a restaurant but I sometimes cook and the meal is planned on the fly then. (Cooking for him has its own challenges given his high caloric intake needs.)

    And with unexpected events, sometimes we only manage four or five meals off of our menu. In that case, we simply roll over that meal to the next menu. Lately, we've been writing seven meals each week so we can pick and choose from our menu every night. For nights where we're too tired to fuss, we add in an emergency meal that's quick and easy or comforting.

    This week...

  • Chef-style cucumber salad with garlic bread
  • Jāņi! Šašliks, Jāņu siers, beer, kvass, grilled pineapple, fries, and more..
  • French onion soup with remaining garlic bread
  • Steak Tacos con Nopales, refried beans, salad
  • Chicken Marsala with orzo-rice and peas, sauteed summer squash
  • Tofu vegetable stirfy over sesame-tamari soybeans
  • Fish sticks with my homemade tartar sauce, broccoli and cheese pasta
  • What's on your menu this week?

    Pioneer Park Farmer's Market

    Downtown at the Farmer's Market

    The downtown Salt Lake farmer's market opened last weekend. While we didn't have a chance to go then (and it's best we didn't, considering the exploding FedEx semi truck), we were able to go today despite the weather.

    Surprisingly, there were more Arts & Crafts stalls than food. Still, there were a sizable number of produce and meat sellers there, along with several stalls to get a snack at (not sure I would recommend the Caribbean lady, as it was fairly bland) or a drink. On our way out, we snagged a couple of limeades -- strawberry for me, lime for him -- which were fantastic. They'd be even better on a hot summer day.

    Best market find: utterly fantastic homemade preserves from Lemon Grove Goods on the outskirts of the market. She let us taste the strawberry-rhubarb and we immediately bought a half pint of that and her apricot. Amazingly good preserves simply prepared.

    Plus, we came across Living on the Edge, a mobile sharpening service, so we're planning to take all of our kitchen knives to him for sharpening in the next couple of weeks.

    We picked up some fresh chanterelle mushrooms from Gnome Grown Mushrooms, a baggie of lemon mint and later, a baggie of chives. We also came across artisan smoked walnut and apple cheddar, which we picked up, and I tried some espresso-lavender cheddar. (Final verdict: very interesting but not for me.)

    Much of the produce this early in the growing season was limited to chard, spinach, lettuces and peas. Since we're still working through a bunch of leafy greens, we couldn't really justify buying more than we could eat in a week. I'm hoping for more berries, peppers and tomatoes as the summer progresses. Considering the wet spring and summer we've had so far, I'm not really surprised.

    All in all, I'm favorably impressed. It's not too bad to get to, parking is clearly marked and plentiful. We'll definitely be returning, though I'd like to see the markets in Murray and South Salt Lake as well.

    Baked Chile Rellenos

    One of the most fun things I've gotten to do with my husband is introduce him to all the foods and cuisines I know and love. Mexican has been particularly enjoyable as Mexican foods are hard to come by in Latvia.

    There is a brand named Santa Maria from Sweden, I believe, that is sold throughout the Baltics. They do tortillas and taco shells, some very basic salsas and mixes, that type of thing. They also do lots of spices and some really fantastic mixes I've had difficulty replicating here. Unfortunately, their Mexican selection is just not that good. Nor are tomatillos or mild but large chili peppers easy to find, especially in winter.

    When we got to the US, many of the first places we went to were Mexican. Places like La Frontera (a Utah tradition) and Chipotle (can't be beat for fast, fresh and cheap food), etc. I found I had a lot of 'splainin' to do when it came to the menus, too! After trying different burritos, enchiladas and tamales, he asked me what there was that was more veggie-based than tortilla- or meat-based that I could make for dinner that week.

    That was easy: "Chile Rellenos," I said. I'd had them at El Palomar in Santa Cruz and thought they were pretty good. At the time, I didn't realize that chile rellenos are often deep-fried and not stuffed with rice and chicken like I thought would be tasty. I started researching it a bit and created a recipe that would suit our desires to limit the amount of meat used, increase veggies and still be filling and delicious.

    This is probably nowhere near a traditional chile rellenos recipe, but I promise, it is delicious. It doesn't need much chicken to be satisfying, 4 ounces, or half of one typical chicken breast, is enough for two to three people. A pepper, plus the rice it rests on will be plenty for a meal for one. All of it can be made up to a day ahead and assembled just before dinner.

    Baked Chile Rellenos [printable recipe]

    • 3 whole poblano or anaheim chile peppers
    • 1 cup shredded cheese (cheddar, jack, mexican blend, etc.)
    • 1 medium yellow onion, sliced
    • 2 - 3 cloves garlic, minced
    • 1 tbsp oil
    • 1 tsp cumin
    • 1/2 tsp chili powder
    • 1/2 tsp garlic powder
    • 1 tsp oregano
    • 2 tbsp fresh cilantro, minced
    • salt and black pepper, to taste
    • 4 ounces boneless, skinless chicken breast
    • 8 oz red enchilada sauce
    • 1 recipe Mexican Rice (recipe follows)

    Making peppers: Place peppers on a baking sheet or broiler pan and broil, turning every five minutes until the skins are blackened and blistered, about 15 minutes or so depending on your broiler. Remove from oven and drop peppers into a paper bag, closing tightly. Let rest at least 10 minutes before opening. Peel off the skins and remove stem and seeds so the peppers can be stuffed. Set aside.

    Over medium low heat, saute onion slices and garlic in oil. Add a bit of salt and cook until onions are soft and turning golden. Remove to a bowl. Sprinkle chicken breast with salt, pepper, chili powder and oregano (all to taste), and saute for 5 - 6 minutes or until cooked through. Remove. Shred chicken using two forks and remove to bowl.

    Preheat oven to 350F.

    Add 3/4 cup of shredded cheese to bowl, along with cumin, chili powder, salt, pepper, garlic powder, oregano and 3/4 of fresh cilantro. Add approximately 1/2 - 3/4 cup of the cooked Mexican rice. Mix together well.

    Place remaining rice in the bottom of a 1.5 qt casserole dish. Open each pepper and stuff full of the chicken mixture, then place atop rice. Pour over enchilada sauce, sprinkle with remaining cheese. Bake at 350F for 15 minutes to warm through and melt cheese. Sprinkle with remaining cilantro and serve.

    Mexican Rice [printable recipe]

    • 1/2 large carrot, peeled, shredded
    • 1/2 red bell pepper, seeded
    • 1/2 small yellow onion
    • 1 small ripe tomato
    • 2 cloves garlic
    • 3/4 c rice (1 "rice cup" if you have a rice maker)
    • 1 1/2 c water (2 "rice cups")

    Making the rice: Using a food processor, finely chop carrot, bell pepper, 1/2 yellow onion, 1 tomato, and 2 cloves of garlic. Over medium heat, saute mixture for about 3 - 4 minutes. Add the mixture to the rice and water in a rice cooker and cook according to manufacturer's directions.

    (Sorry, I quite frankly suck at cooking rice on the stove. If you do this regularly, just do what you usually do... and add the carrot-onion-tomato mixture to it. Otherwise, do what I do and pop it all into a rice cooker, press the button and wander off.)

    Mmm... Pancakes

    Every so often, my husband makes too much kefir for the amount we drink each day. He makes about two quarts a day and every couple of weeks we have too much for our fridge. I'm always happy when this happens because it means we get to have fresh kefir cheese, and, when I can convince him to set the next day's kefir aside for more cheese, it means pankūkas!

    Pankūkas, also known as pancakes, or even Russian syrniki, are wonderful, wonderful munchies that I haven't found an easy way to make here in America. In Latvia, these little gems are made from biezpiens, which is a fresh cottage-type cheese. It's very dry, somewhat crumbly and made from uncooked milk (so it's different from ricotta); the closest we have in America is quark.

    What's a particle doing in the kitchen? Not much, apparently. At least here in the West, quark is unheard of, although Wikipedia notes that it's available in some areas of Canada as "baking cheese". After hitting several Russian markets in Salt Lake, I gave up. It's just not commercially available.

    When we bought our live kefir grains from the Kefirlady, she sent along a packet of instructions, including how to make some basic cheeses, including a basic cheddar-type hard cheese. We were new to the kefir-production gig and we screwed up a few batches while we figured out just what we were doing. One of those accidents resulted in a very hard separation of curds from whey, so after he (grumblingly) fished out the stressed grains, we ladled the curds into a colander lined with cheesecloth and let it rest overnight.

    In the morning, we found a thick cream cheese-style cheese that tasted divine. We added some salt and herbes de provence, then set about repeating it. This time, we fished the grains out and left the batch of kefir to set and separate naturally. The next morning, we ladled it into the cheesecloth-lined colander and waited again. Success! But, I asked, what if we pressed this? What would happen?

    So, we dug up a mixing bowl with a lid, filled it with water and set it atop the cheese. The great thing about this type of cheesemaking is that it's 5 minutes of work for every 12 hours. The bad thing about this type of cheesemaking is the waiting for results.

    In the morning, we lifted off the bowl and stared at the result. It looked, it felt, it even tasted like biezpiens! It wasn't, we knew, but if it looked like a duck and quacked like a duck, we could probably make pankūkas from it.

    By the way, you can try this too! You can do the same thing with buttermilk from the store. Just make sure you place a large bowl underneath your colander and leave it in the fridge. It'll take 24 hours, start to finish.

    Fresh Buttermilk Cheese [printable recipe]

    • buttermilk
    • colander
    • 1 large bowl, 1 smaller bowl with lid
    • cheesecloth, folded into several layers

    Pour buttermilk into a cheesecloth-lined colander set in a large bowl and let it drain overnight in the fridge. The next morning, empty the bowl, make sure the cheesy mass is still wrapped up well and set the smaller bowl of water (with its lid on tight!) on top. Let it drain until dinnertime in the fridge. Hopefully at the end of it, you will have a nice, thick cheese.

    I've never tried making this with buttermilk, but it should work similiarly to kefir. From: The Cook's Thesaurus.

    A few days ago, I managed to convince my husband to make two batches of kefir we didn't need to drink so we could drain and press it into submission. He experimented a bit and wound up with creamy biezpiens instead of nicely dry, but we decided it would probably do. And, the impatient person I am, I wanted pankūkas for lunch that day.

    Plain Latvian Pankūkas [printable recipe]

    • 2 cups well-pressed kefir cheese or substitute
    • all-purpose flour
    • 1 egg
    • pinch of salt

    Combine egg, salt and cheese in a medium bowl. Add just enough flour to obtain a very thick dough-like batter. (The drier the cheese, the less flour is needed.) Set a nonstick pan with about a tablespoon of oil over medium to medium-low heat, then pat out rounds of dough with your hands into 1/2" thick pancakes. Drop them on the pan, careful not to crowd them. Cook, flipping once, about 3 - 4 minutes per side until golden brown and delicious. Remove to a plate, covering to keep them warm while the rest of the batch is cooked.

    Bacon & Onion Pankūkas [printable recipe]

    • 2 cups well-pressed kefir cheese or substitute
    • all-purpose flour
    • 1 egg
    • pinch of salt
    • 1/2 onion, diced fine
    • 4+ strips of thick-sliced, fatty bacon, diced fine

    Fry bacon and onions until nicely cooked - browned on the edges, soft, crispyish bacon. Prepare pankūkas as above to a dough-like consistency then mix in well-drained bacon and onions. Mix well. Cook 1/2" pancakes about 3 - 4 minutes per side over medium to medium-low heat until golden brown and delicious.

    Notes:

    1. Kefir cheese isn't commercially produced here. You might be able to make it from (plain) commercial kefir, but I've never tried. It is, however, possible to make buttermilk cheese using commercial buttermilk.
    2. According to Cook's Thesaurus, it's also possible to drain and press cottage cheese to obtain biezpiens as well. You could probably make it from very well-drained ricotta too.
    3. You can also try these commercially produced cheeses: drained and dried small curd cottage cheese, queso fresco or queso blanco, fromage blanc... Any wet cheese will take a sizable quantity of flour, so dry and drain the cheese as much as possible.
    4. Sweet pankūkas can be made with raisins and dusted with powdered sugar.
    5. I always have my pankūkas with Thai Sweet Chili Sauce.

    Rhubarb Ruminations

    One of the many things my husband introduced me to during my stay in Latvia was rhubarb.

    It's odd that I'd never tried it before, considering I have spent so long in Utah where strawberry-rhubarb pie was always a favorite at the local pie joints. Not to mention canning season when rhubarb is put up for the winter and the long stalks of this ruby-red wonder decorate the produce section temptingly.

    My first encounter with it was in a strawberry-rhubarb cake. Imagine, if you will, thin layers of white cake, interspersed with layers of rhubarb preserves and finished with a thin layer of vanilla cream edged with strawberries, more preserves and rhubarb/strawberry gelatin. It's a typical Latvian-style cake that's offered for sale in Rimi all the time.

    I confess, I grew rather attached to it and miss having it here.

    My husband has been watching the produce at Macey's, our local grocery store, waiting for rhubarb to come down in price. This week, the first sale of the season came around and we bought a few stalks for 44c. When he was a kid, his mom would peel a stalk of rhubarb and set it with a dish of sugar in front of him for a snack. He'd dip the stalk in the sugar and chow down -- enjoying the sweet-sour taste.

    I haven't had rhubarb since returning to the States almost seven months ago, so when he decided he wanted to have one of his favorite rhubarb desserts, rabarberu rausis, I couldn't resist. This rausis, straight from one of our old Latvian cuisine cookbooks called for a fluffy yeast dough topped with sugared rhubarb and a sour cream topping.

    Working with recipes from different cultures and languages can be a bit challenging. This one was no exception.

    In Latvia, when a recipe calls for "yeast" (raugs), it means "cake yeast". According to Red Star Yeast, 2 ounces of cake yeast equals 2 1/4 tsp of active dry yeast. We were halving the recipe so that brought it down even further. Next, the recipe simply said "make a yeast dough," leaving it up to the user to already know how to bake. American sour cream is different in texture from Latvian sour cream. And so on, and so forth.

    The recipe isn't perfect yet. But I can tell you, it's damn good. Sweet, fluffy bread base topped with sweetly sour rhubarb and graced with tangy custard. It's worth experimenting further with, that's for sure.

    Rhubarb Pie (Rabarberu rausis) [printable recipe]

    Adapted from Latviešu ēdieni

    Dough:

    • 250 g ap flour
    • 125 g milk (about 1/2 cup)
    • 40 g + 1 tsp sugar
    • 75 g butter
    • 1/2 egg
    • 3 g salt
    • 1 1/2 tsp active dry yeast
    • 1/4 c warm water (100 - 110F)

    Filling:

    • 400 g rhubarb, peeled and coarsely diced
    • 50 g sugar
    • 75 g sour cream
    • 2 egg yolks
    • buttermilk or kefir
    • 1/2 tsp vanilla extract

    To make the dough: Combine yeast with warm water and 1 tsp of sugar, stirring to dissolve, let sit for 10 minutes until doubled in volume. Mix in flour, half an egg, salt, butter and milk. Place in an oiled bowl on a rack over boiling/steaming water, cover loosely with a clean kitchen towel and let rise for 1.5 to 2 hours until doubled.

    On a floured surface, roll out dough to about 1/2" thickness. Put the flattened dough into a 9x9 greased baking dish (or slightly larger, if you have it) and let rise for another hour.

    Preheat oven to 350F.

    To make the filling: Whip sour cream and egg yolks together, adding in vanilla extract, remaining sugar gradually. Thin with buttermilk or kefir if needed to obtain a pourable consistency (like a thick pancake batter). Peel rhubarb and coarsely dice, then mix with about 30 g sugar and set aside.

    Preparing the finished cake: Indent the edges of the dough like a pizza so that a small 1/2" to 1" wide raised edge will prevent the filling from soaking the bottom of the dish. Spread rhubarb evenly over the dough then pour the batter over.

    Bake at 350F for 40 - 50 minutes until golden brown. If a knife or toothpick inserted in the center comes back clean, it should be ready to come out.

    Gateway Cheese

    It all started with ricotta.

    A recipe would call for it, a sumptuous lasagna, perhaps, or possibly stuffed shells.  Living on a tight budget in an expensive town meant no ricotta unless it was steeply discounted.  (The day I found 99c ricotta on clearance was a very good day indeed.)

    One day a couple of years ago, I wandered around the 'Net, looking for something to do with a gallon of milk in my fridge that was woefully close to its expiration date.  While I like my cereal, using up a gallon in 18 hours seemed a daunting proposition.  I found my answer on a foodie site called eGullet: make ricotta.

    It's not true ricotta which is made from whey left over from making some other cheese, but it's certainly close enough for me.  Most cheesemaking, using as it does various molds, wild yeasts and other unsavory characters bebopping around in our atmosphere seemed rather scary to me at the time.  Ricotta, with its simple instructions to bring milk to 180F then strain anything solid out, seemed foolproof.

    Plus, a gallon of milk costs much less than a pound of ricotta and it would go bad anyway, I reasoned.  What was the harm in experimenting?

    It came out beautifully.  Fluffy white curds of ricotta floated in a yellow sea of whey at the end of the time allotted.  I scooped them out carefully, stopping to taste a bite here or there.  It almost seemed a waste to cook this into a lasagna, to relegate it to merely a supporting character.  

    The lasagna never did get a chance to envelope my ricotta that day.  Instead, I topped portions with honey and nuts to nibble on decadently with a favorite book.  I made a ricotta souffle that I'd always wanted to try but never wanted to risk the money on an inferior brand that would taste more like plastic than cheese.

    After that, I began to play more with cheese.  When I wandered off to Latvia, I learned how to enjoy clotted cream, creme fraiche, biezpiens (known in the US as "quark") and most importantly, kefir.   Most of my cheesemaking right now consists of manipulating kefir in various ways to turn out soft cheesy spreads and quark for making Latvian-style pankukas.

    Later this month, I'll be working with another fast, easy cheese called "Jāņu siers" or "St. John's cheese", a Latvian caraway seed cheese made traditionally for Midsummer celebrations, or Jāņi.  But that's a tale for later.

    Ricotta Cheese [printable recipe]

    Yield: Approximately 200 g.

    • 1 L whole milk1
    • 250 mL buttermilk2
    • 120 mL heavy whipping cream3 (optional)
    • 1/4 tsp fine salt

    Line a large colander or sieve with a clean cotton kitchen towel or cheesecloth, if you have it. Allow the edges to drape over the outside of the colander and place into a large bowl.

    Combine the milks in a large, heavy stockpot. Attach a thermometer to the edge of the pan so that it extends at least 2 inches into the milk. Cook over medium-high heat until the thermometer registers 180F/77C (about 20 minutes), gently stirring occasionally. As soon as the mixture reaches 180F/77C, stop stirring as the whey4 and curds will begin to separate.

    Continue to cook, without stirring, until the milk reaches 190F/88C. If you stir, the delicate curds that have formed will begin to break apart and your ricotta will become grainy. Immediately remove from heat and allow it to sit, undisturbed, for about 30 minutes.

    Using a slotted spoon, gently remove curds to the colander. Allow them to drain5 for a couple of hours, though you can tie the cheesecloth together and hang it from your sink faucet, which can shorten draining times.

    Scrape the ricotta into a bowl and sprinkle with salt, tossing gently with a fork to combine. Refrigerate.

    Notes:

    1. Use the best milk you can afford (or prefer) for the best tasting cheese. Skim or low-fat cheese will not make a great cheese. (Remember, fat is flavor!)
    2. Instead of buttermilk, it is possible to use citric acid (1/2 tsp per litre) or distilled vinegar (1 Tbsp per litre) after the milk reaches 180F.
    3. For creamy dessert-style ricotta, add a quarter-pint of heavy whipping cream to the litre of whole milk when you start for a richer and more decadent cheese.
    4. The leftover liquid, called whey, can be chilled and drank straight like my husband loves to do. It can also be used in place of buttermilk in recipes. A true ricotta is made from whey rather than milk but if you don't make cheese on a regular basis, making it this way is quite a bit more accessible and tastes just as good.
    5. The longer the cheese drains, the drier it will be. Check on it periodically and remove it to the fridge when it's at the consistency you prefer.